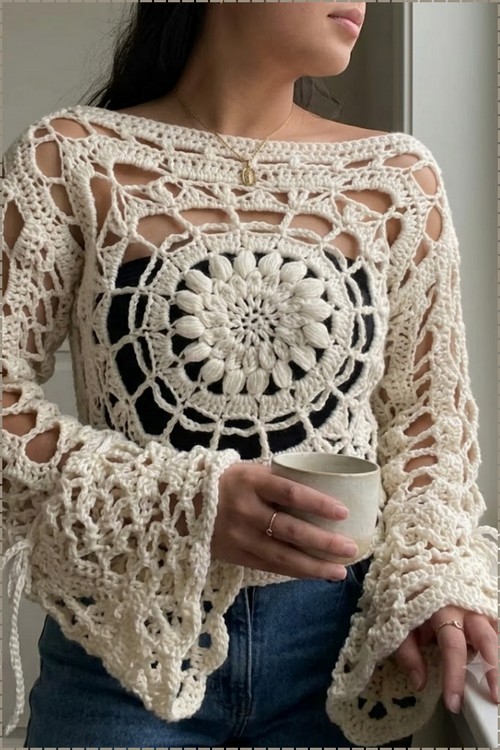
Festival outfits start with a white crochet sweater worn over a black bandeau, where the lace does all the work. Cream cotton keeps the openwork crisp, and a fitted top underneath decides how much skin the mesh shows.
Two large lace squares joined at the shoulders and sides is a construction method that sounds almost too simple for something this elaborate looking. The center mandala motif draws the eye immediately, and the openwork border rounds expand it into a full body panel without any shaping rows or stitch counts to track. This mandala wrap top uses the same circular starting point for a lighter layering piece if the full sweater feels like a bigger commitment.
White Crochet Sweater Layering
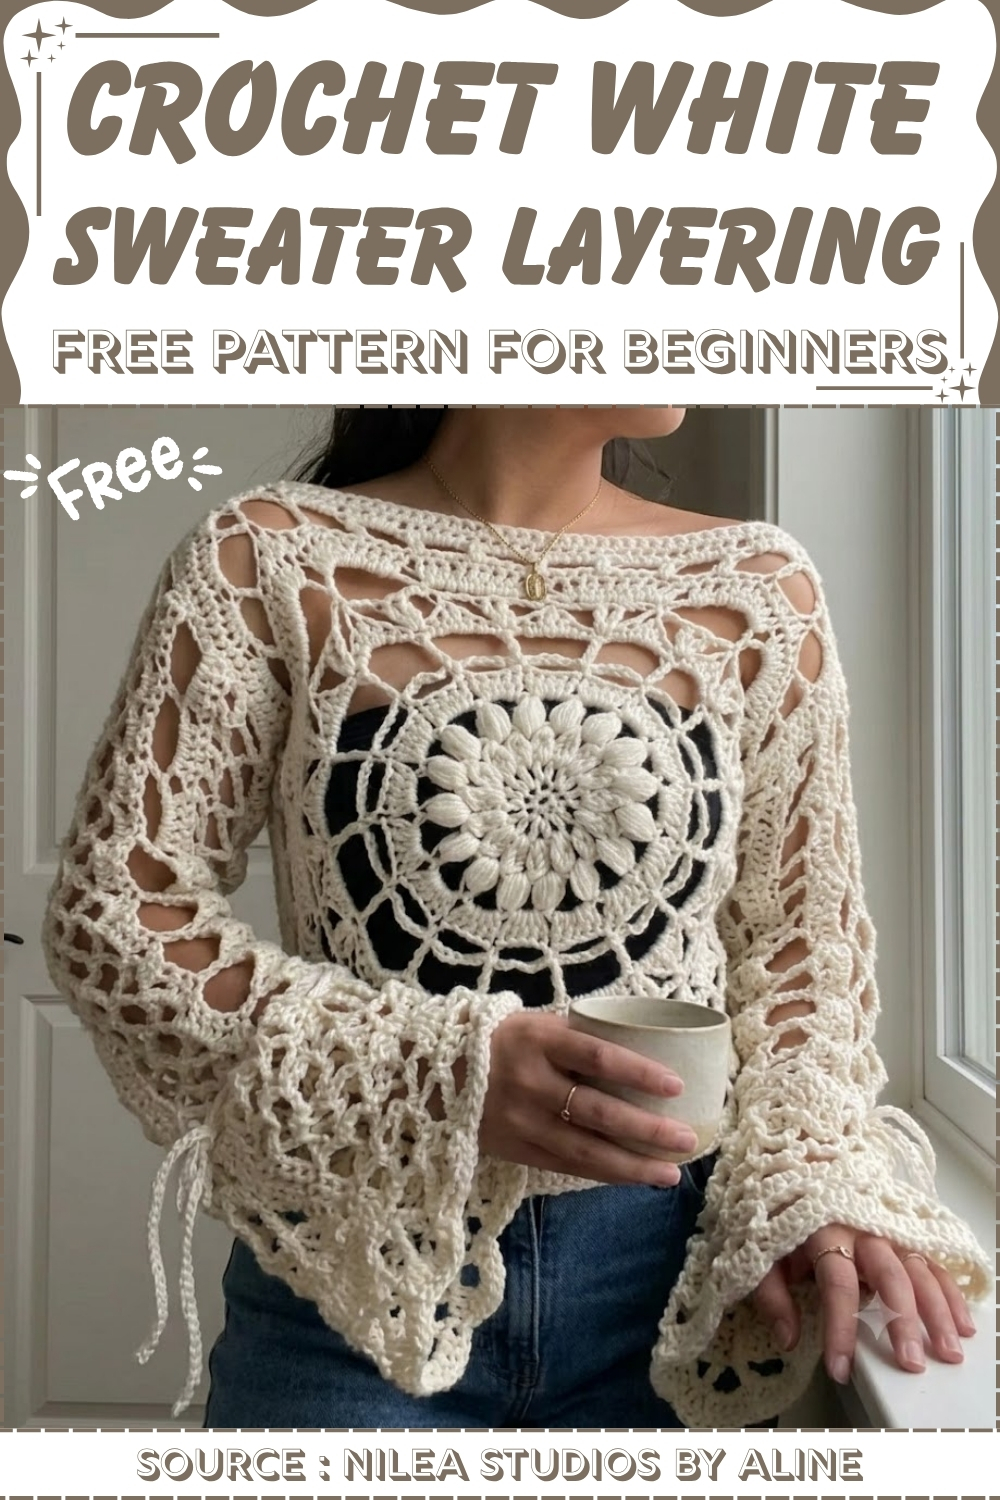
Because the fabric is almost entirely open, this is designed to be worn over something underneath rather than as a standalone top, which is exactly what the title is telling you. The bell sleeves are worked separately and picked up from the square edges, and ties at the wrist let you adjust the flare. The sheer cream yarn keeps the layering effect light enough for three seasons without feeling like outerwear.
Why I love this one: the sweater constructs itself logically from the center of each panel outward, so you always know exactly where you are — even when the stitch pattern gets elaborate.
Materials and Tools
- Approximately 800 yards of 100% acrylic worsted weight (Weight 4) yarn. If you prefer standard-length sleeves rather than extra-long ones, size down your yardage slightly.
- A 6.5 mm hook (deliberately larger than the yarn’s recommended 5 mm hook, which creates better drape and a larger granny square for a small/medium sizing)
- Scissors
- Stitch markers
- Optional: narrow ribbon or spare yarn for tying up sleeves if they run long
Beginner-Friendly Stitch
Stitch Prerequisites
Before starting, you’ll want to be comfortable with the magic ring, single crochet, half double crochet, double crochet, treble crochet, and puff stitch. The pattern builds through all of them in sequence, so knowing each one before you start is the smoothest approach.
Difficulty and Time
This is an advanced project that rewards patience. The 15-round granny square panels cycle through a genuinely wide range of stitch types — clusters, puff stitches, scallops, shells, trebles, and chain loops — and the sleeves have their own multi-row stitch progression. There’s no complicated math, but there is a lot of technique variety. Build in time to learn each new round at its own pace, and don’t rush the puff stitches.
The Pattern
The sweater is made from two large identical granny square panels (front and back), two multi-stitch sleeves, and assembled by seaming the shoulders, attaching the sleeves at the center, and closing the sides and wrist edges.
Step 1: Front and Back Panels (Make 2 — Large Granny Squares)
Both panels are identical. Work through all 15 rounds before starting the second panel.
Round 1
- Make a magic ring. Chain 1 (counts as your first single crochet) and make 7 more single crochet into the ring. Pull the tail tight to close. (8 stitches total.)
Round 2
- Chain 3 (counts as the first double crochet). Work 1 more double crochet in the same stitch, then 2 double crochet in each stitch all the way around. Slip stitch to the 3rd chain to join. (16 double crochet total.)
Round 3 — Sunflower / Crimped Petals
- Chain 3. Work 3 incomplete double crochet into the same stitch, pulling through only the first loop of each, then yarn over and pull through all the loops on the hook to cluster them at the top. Chain 1. Repeat this cluster plus chain 1 in every stitch around. Slip stitch to join.
Don’t let crochet patterns intimidate you! If you’re a beginner, the video tutorial below makes it super easy to follow along!
Round 4 — Puff Stitches
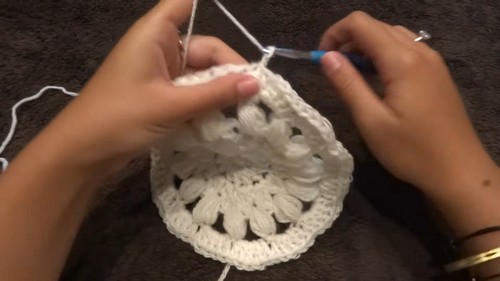
- Pull up a loop approximately the size of your thumb tip and make a 10-loop puff stitch in the space. Chain 3. Make one puff stitch (9 to 10 loops) with 3 chains between each space all the way around. Slip stitch to join. (16 puff stitches total.)
Round 5 — Scallops
- Chain 3. Work 5 double crochet around each chain-3 space from the previous round. Slip stitch to the 3rd chain to join.
Round 6 — Large Loops
- Chain 7, slip stitch into the end of the group of 5 double crochet. Repeat the chain-7 loop all the way around.
Round 7 — Treble Foundation
- Chain 3, then chain 5 more (8 chains total). Work a treble crochet where the loop connects to Round 5. Repeat chain 5, treble crochet all the way around. Slip stitch to join.
Round 8 — Shell Stitches
- In the chain spaces between trebles, work a shell stitch: single crochet, half double crochet, double crochet, treble crochet, double crochet, half double crochet, single crochet. Repeat in every chain space around. Slip stitch to join.
Round 9 — Treble and Chains
- Chain 3, work 2 treble crochet between shell stitches, chain 3, slip stitch into the top of the shell. Repeat chain 3, 2 treble, chain 3, slip stitch to top of shell all the way around.
Round 10 — Large Foundation Loops
- Slip stitch across to the top of the shell. Make a chain of 9 and slip stitch it to the top of the next shell stitch. Repeat around to create 16 large loops.
Round 11 — Double Crochet Base
- Chain 3, then work 10 double crochet into every chain-9 loop all the way around. Slip stitch to join. (160 double crochet total.)
Round 12 — Shaping the Square Corners
- Work the corner sequence: 2 half double crochet, 2 double crochet, then 2 treble, chain 1, 2 treble for the peak corner. Work 30 single crochet down the side, then repeat the corner increase sequence. Slip stitch to join.
Round 13 — Square Treble Base
- Chain 3, then chain 5 more. Work a treble crochet every 4 stitches along the sides, and work 2 treble, chain 3, 2 treble into the corner spaces. Slip stitch to join.
Round 14 — Half Double Crochet Border
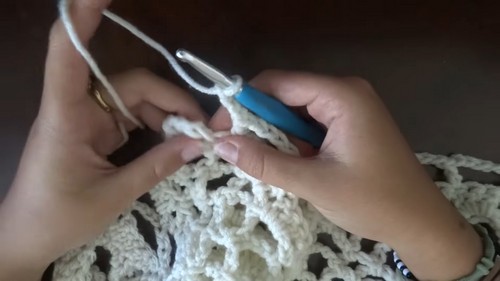
- Chain 2, then work 5 half double crochet in every window space all the way around, including the corners. Slip stitch to join.
Round 15 — Final Square Border
- Work 1 half double crochet in every half double crochet stitch. At the corners, skip the middle stitch of the 5-half-double-crochet group and replace it with a chain-3 arch: half double crochet, half double crochet, chain 3, skip 1, half double crochet, half double crochet. Slip stitch to join. Fasten off.
Step 2: Sleeves (Make 2)
Designer note: The sleeves in the original turned out very long. If you want standard-length sleeves, subtract approximately 20 stitches from your initial base chain.
Base chain
- Chain your desired arm length. (The creator chained 74 stitches.)
Row 1
- Chain 3, skip 3, and work 1 double crochet in every chain stitch down the row.
Rows 2 and 3 — Eyelets and Double Crochet
- Work an eyelet row (double crochet, chain 1, skip 1), followed by a standard row of 1 double crochet in every stitch.
Row 4 — Wave Stitch
- Chain 3 and work a wave pattern down the row: double crochet, half double crochet, single crochet, slip stitch, single crochet, half double crochet, double crochet, treble, double crochet, half double crochet, single crochet, slip stitch.
Row 5 — Box Row
- Chain 4 and work treble crochet, chain 4 alternating between previous treble and slip stitches to build a row of large squares.
Row 6 — Inverse Wave
- Work the inverse wave pattern using single crochet, half double crochet, double crochet, treble over the square loops to smooth out the edge.
Rows 7 and 8 — Double Crochet and Chain Loops
- Work a row of 1 double crochet in every stitch, followed by a chain-7 loop row placed every 6 stitches.
Rows 9 to 14 — Triangles, Mesh, and Double Crochet Increases
- Connect the chain loops with chain-4 triangles. Fill with 4 double crochet per space. Add a mesh diamond section (chain 5, single crochet). Collapse with chain-3 connections, and fill back in with 3 to 4 double crochet per space to return to your main stitch count of 74.
Final row
- Finish with a final open treble crochet, chain-5 block row. Cut yarn and fasten off.
Step 3: Assembly and Construction
Shoulder seams
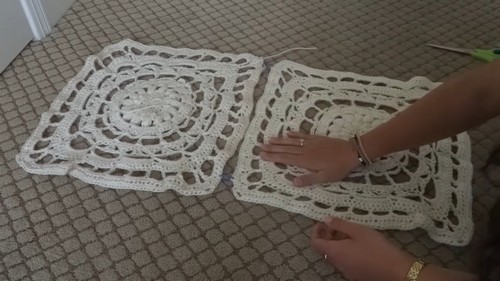
- Lay the front and back squares down with wrong sides facing up.
- Pin the top shoulders together, leaving an open neckline. (The creator skipped approximately 4 stitches in on each side for the neck opening.)
- Slip stitch or single crochet the shoulder seams closed from the wrong side.
Attaching the sleeves
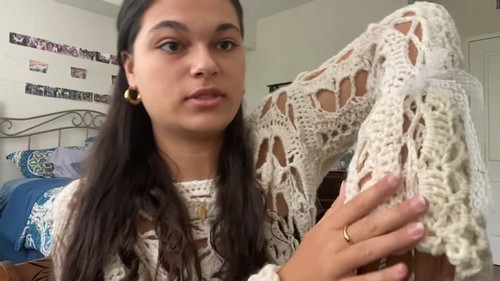
- Find the approximate middle of each sleeve and pin it directly to the shoulder seam.
- Stretch and pin the edges of the sleeve equidistant down the sides of the square panel.
- Single crochet the sleeves onto the main body from the wrong side.
Closing sides and wrists
- Fold the sweater inside out.
- Crochet from the wrist up the sleeve, then down the side of the sweater body to seal it completely.
- Turn the sweater right side out and weave in all loose ends. If the sleeves are very long, tie them up with small bows or ribbon for a styled finish.
Tips and Troubleshooting
- Work each granny square round completely before counting your stitches. The puff stitch and cluster rounds in the early sections can be easy to lose count in — a quick count at the end of each round catches any drift before it compounds.
- Swatch your puff stitch before Round 4. The puff stitch size (9 to 10 loops) affects the visual weight of the whole center medallion. A quick practice puff on a scrap piece means Round 4 will be consistent from the first puff to the last.
- Pin the sleeve center to the shoulder seam before sewing. It’s easy to attach a sleeve slightly off-center, which makes the finished sweater pull to one side. Pinning at the midpoint first, then distributing the remaining sleeve fabric evenly down both sides, keeps the hang symmetrical.
- Test sleeve length before finishing. Hold the sleeve against your arm before the final row — if it’s already too long, trim the row count before adding the final treble-chain block row.
Customization Ideas
- Shorten the sleeves. The creator notes her original sleeves ran long. Subtracting approximately 20 stitches from the base chain gives a more standard sleeve length; fewer rows or an earlier final row shortens it further.
- Add a front closure. Work a row of evenly spaced chain loops along both front opening edges and thread ribbon through for a soft tie front.
- Change the yarn weight. A lighter DK or sport weight on the same hook will give a lacier, more transparent fabric; a full worsted on the recommended 5 mm hook gives more structure.
- Work one square in a contrast color. Using a different color for the first few rounds of the center medallion creates a focal point visible through the lacework.
Frequently Asked Questions
1. Why use a 6.5 mm hook instead of the recommended 5 mm on the label? Sizing up creates a more open, fluid fabric in the granny square panels — the extra space between stitches gives the lacework its airy, draped quality. The 5 mm hook would give a denser, stiffer result that wouldn’t layer as beautifully. This is a deliberate design decision for the small/medium sizing.
2. The sleeve rows seem complicated — do I need to follow them exactly? The sleeve rows build a layered textile that matches the visual complexity of the body panels. You can simplify the sleeves (for example, using only the eyelet and double crochet rows) for a plainer sleeve, but the contrast between the intricate body and a plain sleeve will be noticeable. The original pattern works toward a cohesive finished look.
3. My puff stitches look different sizes — how do I keep them consistent? Consistent loop length is the key. Pull every loop up to approximately the same height (the creator uses thumb-tip length as a guide) before closing the puff. If you work with a loose, even tension and pull each loop deliberately, they’ll settle into a fairly uniform size.
4. The sweater is sized for small/medium — how would I size it up? The panel size (and therefore the overall fit) is controlled by how many rounds you work on the granny square. More rounds make wider panels and longer sleeves. You can also work more rows on the sleeve base chain for a longer sleeve and add stitches to the base chain for extra arm width.