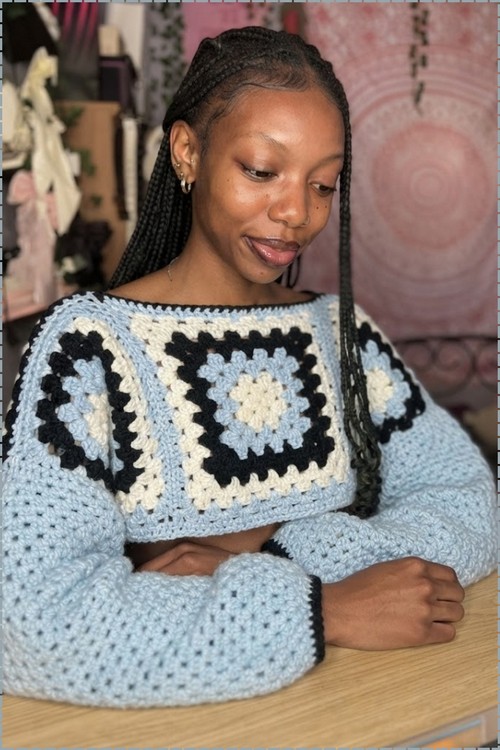
Crochet this easy off the shoulder crop sweater from six granny squares joined into a light blue yoke, then work the sleeves in open granny stitch rows. Beginners finish the cropped sweater with one round of black trim at the cuffs and hem.
Yoke on this one is built from separate granny squares that get joined into a single panel before the sleeves are worked at all. Light blue carries most of the surface while black and cream centers break up the grid and stop it reading flat. Anyone who has finished a cropped sweater before will recognise the construction on sight.
Off Shoulder Crop Sweater Crochet
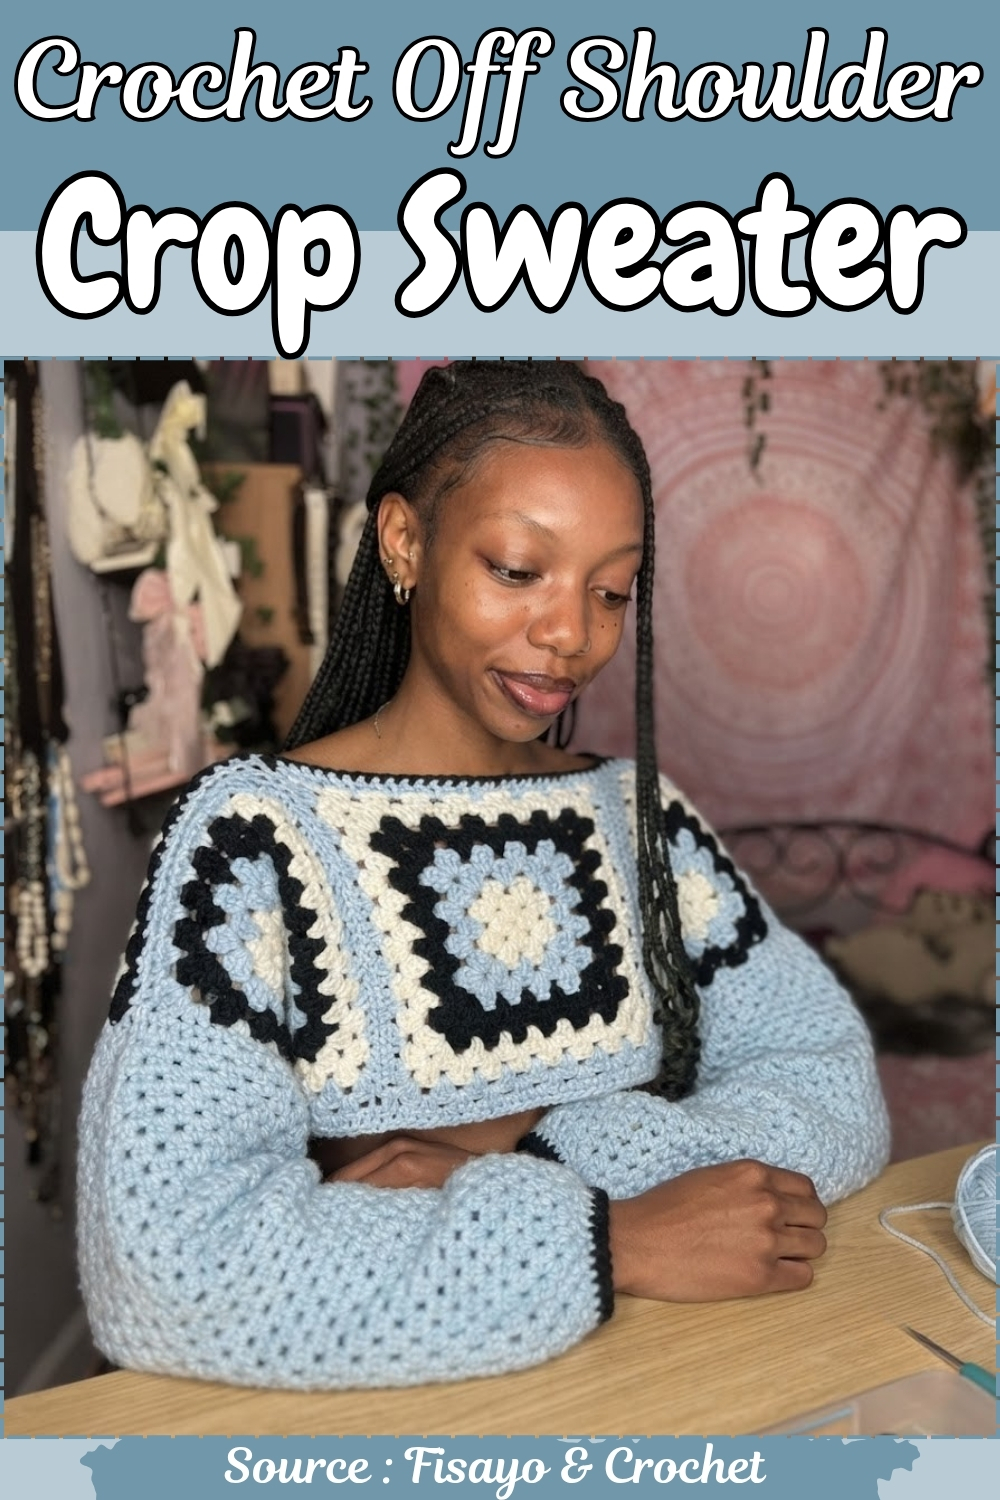
Sleeves move into continuous granny rows worked down from the joined panel, so the fabric stays open and light through the arm. A single round of black at the cuff and the lower edge pulls the trim back to the square centers. The off shoulder drape comes from the width of the neckline rather than from any shaping worked into it.
Materials & Tools
- 4-weight (worsted) yarn in three colors (the sample used blue, white, and black — pick any colors you love), about 300g total, adjustable for size
- 5 mm crochet hook
- Stitch markers
- Yarn needle
Basic Stitch to Know
Difficulty & Time
This is a beginner-friendly garment. Every part uses the same basic granny cluster (3 double crochets in a space), so once you learn that one move, you’re most of the way there. Give yourself time for the six squares first, then the joining and sleeves — a few relaxed evenings across a week or two.
Overview
The sweater is made from 6 granny squares total — 3 joined into a front panel and 3 into a back panel. After joining the panels at the shoulders and sides, you work directly onto the fabric to add the sleeves and edgings.
Beginner Technique Notes
- Take a moment with these skills before you dive in — they’re the whole foundation of the project, and they’re all beginner-level once you see them broken down.
- The magic ring. This is how each square starts. You wrap the yarn around your finger to make an adjustable loop, work your first stitches into it, then pull the tail to cinch the center closed tight. If the magic ring feels tricky at first, you can chain 4 and slip stitch into the first chain to make a starting ring instead — it works almost as well.
- The granny cluster. This is the single stitch group the entire sweater is built on: 3 double crochets worked together into one space. Along the straight sides of a square you place one cluster per space; in the corners you work a fuller group of 3 double crochets, chain 2, 3 double crochets to make the square turn its corner. Getting comfortable telling a “side space” from a “corner space” is the main thing to practice.
- Changing colors. You switch colors at the join between rounds. Instead of finishing the slip stitch with your old color, you pull the new color through — a clean, simple way to swap shades without a bulky knot.
- Joining with single crochet through back loops. When you seam squares and panels, working single crochet through only the back loops of both pieces gives a neat, flexible seam that lies flat. Keep it a touch loose so the seam has the same give as the fabric.
- The cluster decrease (for the sleeves). To taper the sleeves you’ll combine two partial double crochets into one. Work a double crochet in the first space but stop with 3 loops on the hook (pull through 2), start another in the next space and stop with 4 loops on the hook, then yarn over and pull through all the remaining loops together. This quietly narrows the sleeve without leaving a gap.
The Pattern
Making the Granny Squares (Make 6)
Each finished square measures about 8.5 inches across and takes 9 rounds. Color example from the sample: white for 2 rounds, blue for 2 rounds, black for 2 rounds, white for 2 rounds, and a final single round of blue.
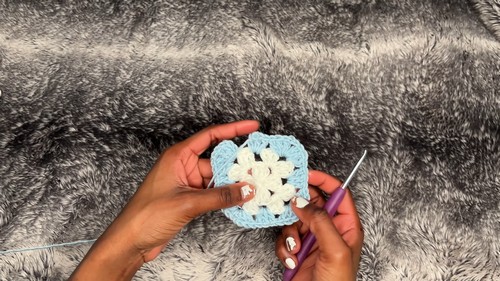
- Make a magic ring: wrap the yarn around your finger, insert your hook, pull through, and chain 1.
- Round 1: Chain 2 more (this counts as your first double crochet). Work 2 more double crochets into the ring for a cluster of 3. Chain 2 for the corner space. Repeat [3 double crochets, chain 2] three more times so you have 4 clusters total. Pull the magic ring tight to close the center, chain 2, and slip stitch into the top of the starting chain to join. Slip stitch across to the next corner space to get ready for the next round.
- Rounds 2 through 9: Chain 3 (counts as the first double crochet), then work 2 double crochets, chain 2, and 3 double crochets all in that same corner space. Along the sides, work 3 double crochets into each space. In every corner space, work 3 double crochets, chain 2, 3 double crochets to expand the square. Slip stitch to join the round, changing colors as desired by pulling the new color through the slip stitch.
- After the 9th round, chain 1 and fasten off.
Still getting the hang of reading crochet patterns? That’s completely okay, the video tutorial below breaks everything down in a simple, beginner-friendly way!
Joining the Panels (Front and Back)
- Line up 3 granny squares side by side, with the wrong sides facing outward.
- Join your yarn at the corner and work single crochets through the back loops only of both squares, seaming them from bottom to top.
- Repeat to make two panels of 3 squares each — one front, one back.
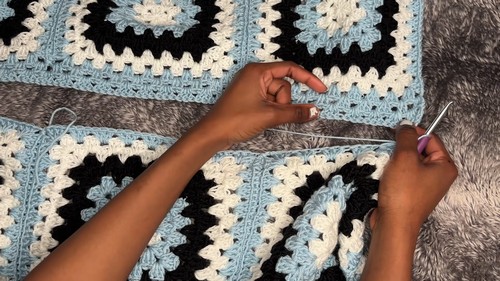
Adding length (optional):
- To lengthen the sweater, attach yarn to the bottom edge of a panel.
- Chain 2, double crochet in the same space, and work clusters (3 double crochets per space) across the row.
- Turn, chain 3, and add more rows of granny clusters until you reach your desired length. Fasten off.
Seaming front and back panels:
- Place the front and back panels together with the wrong sides facing each other.
- Seam the shoulders and sides with single crochet through the back loops, leaving the neck opening and armholes open. For a more off-the-shoulder look, leave more of the top shoulder seam unjoined.
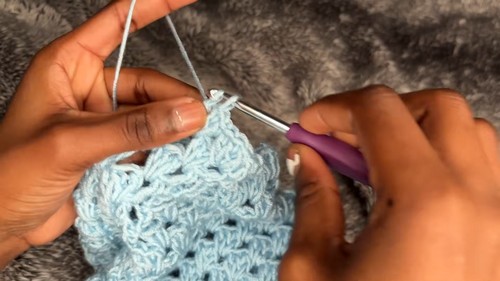
Crocheting the Sleeves
- Attach your yarn at the armhole opening on the right side of the fabric.
- Chain 3, work 1 double crochet into the space, then work clusters (3 double crochets per space) all the way around the armhole opening. Slip stitch to join the round.
- Continue in rounds of cluster stitches (chain 3, double crochet in the previous double crochet, then clusters around).
- Tapering: On specific rounds (such as rounds 3, 5, 18, and 22), work a decrease to narrow the sleeve toward the wrist. To decrease: work a partial double crochet in the first space (stopping with 3 loops on the hook, pull through 2), a partial double crochet in the next space (4 loops on the hook, pull through 2), then yarn over and pull through all remaining loops.
- Work straight rounds with no decreases between the tapering rounds until the sleeve reaches your desired length (around 21 rounds total).
- Wrist cuff: Finish with a round of half double crochets all the way around. Slip stitch to join, chain 1, and fasten off. Repeat for the second sleeve.
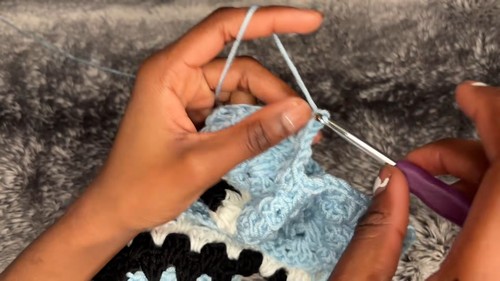
Neckline and Edging
- Attach your yarn anywhere along the top neck opening.
- Chain 1, then work a round of single crochets all the way around the neckline. Slip stitch to join, chain 1, and fasten off.
- Weave in all loose ends with your yarn needle.
Tips & Troubleshooting
- Block your squares before joining. Gently pinning and shaping each square to the same size makes seaming so much easier and keeps the panels even. Squares that don’t quite match up are the most common beginner frustration.
- Count your clusters per side. All six squares should have the same number of clusters along each edge. Check as you finish each one so your panels line up cleanly.
- Keep seams loose and flexible. Single crochet through back loops only, without pulling tight, gives a seam that stretches with the fabric instead of puckering.
- Weave ends as you change colors. With this many color changes, tucking in ends as you go saves you from a mountain of them at the end.
FAQ
- I’ve never made a sweater — is this really doable? Yes. It’s one of the friendliest first sweaters because it’s just six small squares plus simple seaming and sleeves. You only need to learn the granny cluster and a couple of easy joins, and you practice them over and over.
- What if I can’t do the magic ring? No problem at all. Chain 4 and slip stitch into the first chain to form a ring, then work your first round into that. It gives you a small hole in the center, but it’s a perfectly good beginner alternative.
- How do I make the sweater bigger or smaller? The easiest adjustments are your square size (more or fewer rounds, or a different hook and yarn weight) and the optional added length rows at the bottom. The off-shoulder fit is naturally relaxed, so it forgives small sizing differences.
- My squares came out different sizes — what went wrong? This is almost always tension differences from one square to the next, and it’s very common early on. Blocking usually evens them out, and keeping the same cluster count per side keeps them consistent going forward.
- Which colors should I use? Anything you like. The sample uses blue, white, and black in a repeating sequence, but the pattern works beautifully in a single color, a soft gradient, or a bold mix. Just keep the color order the same across all six squares for a matching look.
- Take it one square at a time — before you know it you’ll have a whole sweater you made yourself, and it’ll feel amazing to wear.