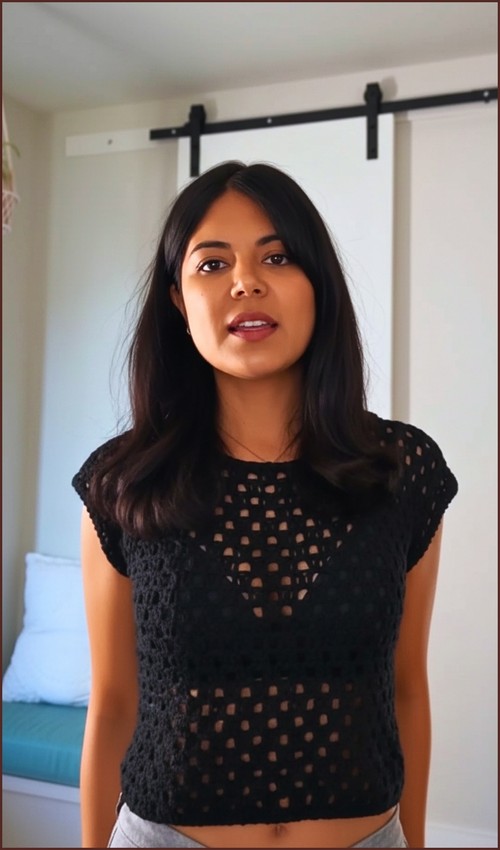
Shell stitch has a way of making a finished top look more involved than the actual stitch count suggests, the repeating fans create texture and movement in one step, which is exactly why this rust peplum top works so well as a beginner make. The flared hem comes naturally from the shell repeat widening toward the bottom, so there’s no separate shaping to manage. If you’ve worked the shell stitch peplum top, the stitch rhythm here will feel immediately familiar.
Crochet Bamboo Yarn Top

Bamboo yarn gives the fabric a soft drape and a slight sheen that works especially well with the open shell pattern cotton blends are a good substitute if bamboo isn’t accessible. For another spaghetti-strap silhouette with a different stitch texture, the ribbed spaghetti strap top is worth bookmarking alongside this one.
What You Are Making
This top is worked in separate functional sections rather than as one continuous garment. That is helpful because each part has a specific job:
- The main shell stitch panel forms the fitted upper body
- The back ribbon straps create the adjustable tie closure
- The ruffles add length, softness, and movement below the underbust
- The shoulder straps and edging finish the top and help hold the shape in place
The overall result is a lightweight crochet top with structure through the bodice and more drape and volume through the lower ruffle section.
Why the Construction Works
The shell stitch body creates visual texture while still staying flexible enough to fit the body comfortably. The repeated shell and single crochet placement also gives the fabric a balanced rhythm, so once you understand where the shells are anchored, the body becomes much easier to manage.
The back ribbon ties make the fit more adjustable than a fully closed back. That matters for this kind of top because yarn stretch, personal preference, and bust shaping can all affect how snugly you want the finished piece to sit.
The ruffles are added after the main panel is complete, which lets you control their fullness separately from the body fit. That means you do not need to worry about extra flare affecting the underbust area.
Fit and Sizing Guidance
The pattern gives a starting chain for extra small to small sizes and then instructs you to add stitches for each size up. Since the foundation chain must stay divisible by 6 plus 2, it is important to increase in the stated increments so the shell pattern continues to line up correctly.
A few fit points to keep in mind:
- The main body width affects how much coverage you get across the front
- The underbust length determines where the ruffles begin
- The back ribbon length controls how securely and comfortably the top ties
- The shoulder strap length affects both support and neckline placement
Because this is a wearable piece, it helps to measure against your body as you go instead of relying only on row counts. The pattern gives approximate row numbers, but your yarn, tension, and personal fit preference may change the exact number needed.
Before You Start
A few things will make this project easier:
- Count your foundation chain carefully before beginning Row 1
- Use stitch markers if needed to identify the center of shells
- Check your fabric after the first few rows to make sure the shell repeat is lining up cleanly
- Measure the body section against your underbust before moving on to the ties
- Decide early whether you want softer ruffles or fuller ruffles, since the later rows increase volume
If your tension is tight, the shell stitch fabric may feel firmer and narrower than expected. If your tension is loose, the top may grow wider or longer more quickly. That is normal, but it is worth checking after several rows so you can adjust early if needed.
Materials
- 6 ply combed cotton yarn or size 2 sport weight yarn
- 3.5 mm crochet hook
- Tape measure
- Stitch markers
- Darning needle
Pattern Notes
- The foundation chain needs to remain divisible by 6 plus 2 so the shell stitch repeat works correctly
- Shells are made by working 5 double crochet into the same stitch or space
- The single crochet stitches act as anchor points between shells
- The center stitch of each shell is important because later rows are worked into that center point
- Turning chains help position the next row but do not change the shell count
- The ruffles are built in layers, so they become fuller as the stitch groups increase
Main Body Shell Stitch
- Create a foundation chain divisible by 6 plus 2
- Chain 44 for extra small to small sizes and add 6 stitches for each size up
- Single crochet in the second chain from the hook
- Skip 2 chains and work 5 double crochet in the next chain to form a shell
- Skip 2 chains and single crochet in the next chain
- Repeat this sequence across the row
- Chain 2 and turn for the next row

- Work 4 double crochet in the first stitch
- Single crochet in the center double crochet of the previous shell
- Work 5 double crochet in the single crochet between shells
- Repeat across and finish with 4 double crochet in the last stitch
- Chain 2 and turn
- Work 2 double crochet in the first stitch and single crochet in the next stitch
- Work 5 double crochet in the single crochet from the previous row
- Single crochet in the center stitch of the next shell
- At the end, single crochet in the second to last stitch and work 2 double crochet in the last stitch
- Chain 1 and turn
- Single crochet in the first stitch
- Work 5 double crochet in the single crochet from the previous row
- Single crochet in the center stitch of the next shell
- Repeat across and single crochet in the last stitch
- Repeat the previous three rows until the piece reaches the underbust, approximately 16 rows or 6 inches
- Reading crochet patterns can be tricky when you’re just starting out, feel free to follow the video tutorial below instead!
Main Body Stitch and Shaping Clarity
This section becomes much easier once you see the pattern logic.
You are alternating between shell groups and single crochet anchor points. The shells are always worked into the single crochet spaces from the previous row, and the single crochets are placed into the center of the previous shell. That back and forth rhythm is what keeps the pattern aligned.
There are a few places crocheters commonly get confused:
The edge stitches look different from the middle repeats
- That is intentional. The rows begin and end with partial shell shaping such as 4 double crochet or 2 double crochet. These edge adjustments help the sides stay cleaner and straighter.
The center stitch of the shell matters
- When the pattern says to work into the center stitch of the previous shell, count carefully. In a 5 double crochet shell, the third double crochet is the center stitch. Placing the single crochet there keeps the shell pattern symmetrical.
The row count is less important than the underbust measurement
- The pattern gives approximately 16 rows or 6 inches, but body length can vary depending on bust height and personal preference. If you need more coverage before the ruffles begin, use the measurement first.
Back Ribbon Straps
- Attach yarn at the side edge of the top
- Work 8 double crochet evenly along the side
- Chain 2 and turn
- Work 1 double crochet in each stitch across
- Repeat this row until the strap reaches your desired tie length, approximately 44 rows
- Repeat the same process on the opposite side

Back Ribbon Strap Notes
These straps are both functional and structural. They help secure the top around the body, so it is worth checking that both sides are the same width and length.
A few helpful tips:
- Count the first 8 double crochet carefully so both ties match
- Keep your turning tension even so the straps do not taper
- Measure both straps before fastening off rather than relying only on row count
- If you want larger bows or more wrap length, add extra rows before finishing
Because these straps are worked in plain double crochet rows, they may stretch slightly with wear. Cotton yarn tends to hold shape well, but it is still a good idea to make the ties long enough for a comfortable knot or bow.
Ruffles
- Fold the top to find the center and place stitch markers at the underbust level
- Attach yarn at the marker on one back ribbon edge
- Chain 3 and work 1 double crochet in the same space
- Chain 2 and work 2 double crochet in the same space
- Skip one row or stitch
- Work 2 double crochet, chain 2, and 2 double crochet in the next space
- Repeat across the bottom edge
- Slip stitch into the first chain 2 space
- Chain 3 and work 1 double crochet
- Chain 2 and work 2 double crochet in the same space
- Repeat in every chain 2 space across

- From the fourth row onward, increase to 3 double crochet, chain 2, and 3 double crochet in each space for more volume
- Continue until reaching row 8 or your preferred ruffle length
- For the final edging, work 6 double crochet in each chain 2 space and slip stitch between shells to create a scalloped finish
Ruffle Section Clarity
This section adds softness and movement, and it is built in stages so the fullness grows gradually.
At first, the ruffle establishes its base with grouped stitches and chain spaces. Those chain 2 spaces become the key points that later rows build into. Once that base is stable, the increase to 3 double crochet, chain 2, and 3 double crochet creates noticeably more volume.
Here is what to watch for:
Keep your spacing consistent across the bottom edge
- If your first ruffle row is unevenly spaced, the fullness may bunch in one area and look sparse in another. It helps to pause every few repeats and visually check that the groups are sitting evenly.
The chain 2 spaces are the building points
- Later rows are worked into those chain spaces, not randomly into the stitch tops. If the ruffles start looking misaligned, go back and check whether each cluster is placed into the correct chain space.
More stitches create more drape and bounce
- The shift from 2 double crochet groups to 3 double crochet groups is what gives the lower ruffle extra fullness. If you want a softer look, stop earlier. If you want more drama, continue through the later rows as written.
The final scalloped edge should sit lightly
- Working 6 double crochet in each chain 2 space creates the decorative edge. Try not to crochet too tightly here or the scallops may curl inward instead of opening nicely.
Shoulder Straps and Edging
- Attach yarn to one back ribbon edge
- Single crochet evenly along the top edge of the top
- At the corner, chain 50 or your desired strap length
- Attach the chain to the opposite back ribbon edge with a slip stitch
- Single crochet back along the chain to thicken the strap
- Continue single crochet edging along the top edge
- Repeat the same process for the second shoulder strap
- Fasten off and weave in all end

Shoulder Strap and Edging Notes
The edging does more than finish the look. It helps tidy the upper edge, adds a bit of structure, and reinforces the straps.
The strap chain length is adjustable, which is useful because torso height and bust placement vary a lot from person to person.
Before making the second strap, it is smart to try on the top and check:
- whether the neckline sits where you want it
- whether the straps feel supportive
- whether the top pulls too high or sits too low
Crocheting back along the chain thickens the strap and makes it less flimsy than a plain chain alone. That added stability matters for wearability.

Beginner Notes
Even though the finished top has decorative details, the project is very manageable if you take it section by section.
Helpful reminders for newer garment crocheters:
- Do not rush the foundation chain count
- Learn to identify the center stitch of each shell before moving quickly
- Measure often rather than assuming your tension matches the sample
- Use stitch markers freely, especially at the shell centers and ruffle starting points
- Make one strap first, test the fit, then match the second strap to it
The biggest skill in this project is not advanced stitching. It is staying organized while reading repeating sections correctly.
Troubleshooting
My shell pattern is not lining up
Check your starting chain count first. Then look at whether each shell is being placed into a single crochet from the previous row and each single crochet is being placed into the center of a shell. A small mistake early on can shift the whole pattern.
My sides look uneven
The edge stitches are slightly different from the center repeats, so they can feel awkward at first. Recount the opening and closing stitches of each row and make sure you are not accidentally adding or skipping one.
The body feels too short
Use the underbust measurement as your guide rather than stopping at the row estimate. Add more repeats of the previous three rows until the coverage feels right.
The ruffles look too stiff
Check your tension. Tight stitches can reduce drape, especially in cotton yarn. You may also prefer stopping before the fullest rows if you want a lighter finish.
The straps feel too long or too short
Since the chain length is adjustable, fit the first one on your body before matching the second. It is much easier to correct before weaving in ends.
Finishing Notes
Take your time with the final finishing because it makes a big difference in how polished the top looks.
- Weave in ends securely, especially at the strap joins and ruffle attachment points
- Check that both back ties are even before finishing
- Lightly shape the ruffles with your hands after the final edging
- If needed, gently block the piece to open the shell stitch and smooth the edges
Cotton yarn usually shows stitch definition beautifully, so neat finishing will really help the shell pattern and scalloped edge stand out.
Final Thoughts
What makes this top satisfying to crochet is that each stage visibly transforms the piece. First you build the structured shell stitch panel, then the adjustable ties, then the ruffled lower section, and finally the straps that bring everything together. Worked patiently, it becomes a very wearable project with texture, shape, and enough flexibility to customize the fit without changing the written pattern.