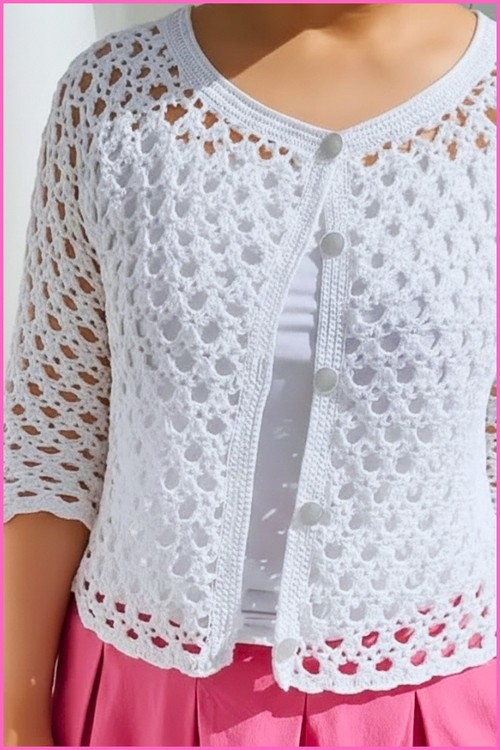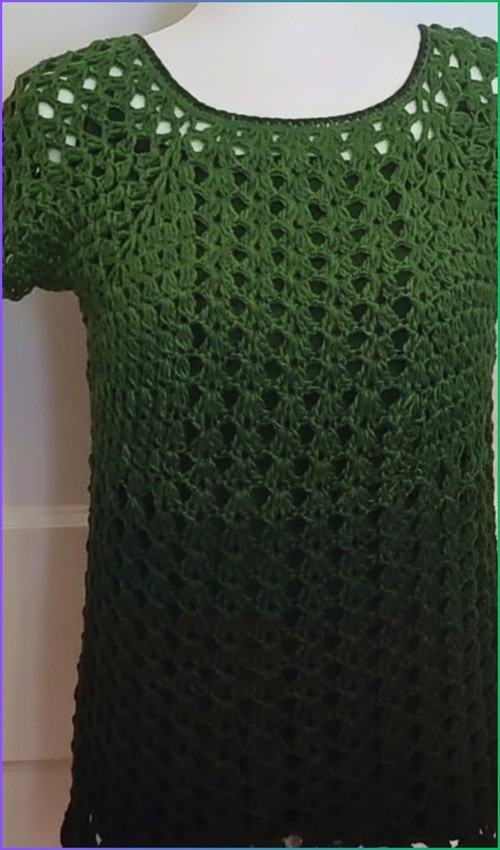
Shell stitch has a way of making a simple top look like it took twice as long as it did the repeating fan clusters create a lacy, textured fabric that drapes beautifully in both solid and ombre yarns. This short-sleeve version works up from a straightforward row repeat, making it very manageable for beginners despite how polished it looks finished. If the shell stitch silhouette appeals to you, the crochet peplum top shell stitch is a close sibling with a flared waist detail.
Cute Crochet Tops Summer Outfits Casual

The raglan-style shaping means there’s no complicated armhole math you increase at set points and the sleeves grow naturally out of the body. It’s size-adjustable, and the shell repeat scales easily with gauge, so minor hook or yarn swaps don’t derail the fit. For another shell stitch option with a different back design, the backless shell stitch top makes a great next project after this one.
Materials and Tools
- Medium weight 4 acrylic yarn or sport weight cotton yarn
- Crochet hooks in multiple sizes: 6 mm, 6.5 mm, and 7 mm
- Stitch markers
- Scissors
- Yarn needle

Stitch Used from Start to Finish
Abbreviations:
- ch — chain
- sc — single crochet
- dc — double crochet
- sl st — slip stitch
- st — stitch
Difficulty and Time
Skill level: Beginner — suitable if you know chains, sc, and dc
Time: A relaxed weekend project; expect 8–12 hours for a first make
Beginner Technique Notes
What is a V stitch?
A V stitch is two double crochets worked into the same stitch or space with a chain in between: dc, ch 2, dc. The chain-2 space sits at the center of the V and becomes the spot where future increases are worked. V stitches mark the corners of the yoke in this pattern and are how the top grows wider with every round.
What is a fan stitch?
A fan stitch is a group of stitches all worked into the same space — in this pattern, 2 dc, ch 2, 2 dc all into one chain space. The stitches fan out on either side of the chain, creating the lacy, textured panels between the corners. You’ll make six fan stitches between each pair of V stitch corners on the yoke.
What is a cluster stitch?
A cluster is made by working three double crochets together so they share one final loop. You begin each dc, stop before the last pull-through, and hold the incomplete loops on the hook. After all three are started, one final yarn over pulls through everything at once. Clusters appear at the edges of the corner sections as the yoke increases, and again at the underarms to close the armholes neatly.
Working in rounds vs. rows:
This top is worked in continuous rounds — you crochet in a spiral rather than turning the work at the end of each row. At the end of each round, slip stitch into the first stitch to close it before chaining up for the next. Keep a stitch marker in that closing stitch so you always know where the round ends.
Stitch markers:
Place markers in the chain-2 spaces at all four V stitch corners at the end of Round 2 and move them up each round. They tell you exactly where to work your increases. Without them, it’s easy to drift — especially on the yoke where the stitch count is still building.
Multiple hook sizes:
The pattern uses three hook sizes. A larger hook opens the fabric and creates drape; smaller hooks tighten the gauge. Switching between them as the pattern directs controls how the top fits through the yoke and body. Label your hooks before you start so you’re not guessing mid-row.
The Pattern
Neckline — Round 1
- Chain 84 and join with a sl st to form a circle, making sure the chain lies flat and is not twisted before joining.
- Ch 1 and work 1 sc into every chain around.
- Sl st into the first sc to close the round.

Establishing the Yoke — Round 2
- Ch 5 and dc into the same stitch to form the first V stitch corner. (The ch 5 counts as dc + ch 2.)
- Place a stitch marker in the ch-2 space.
- Skip 2 sts and work a fan stitch of 2 dc, ch 2, 2 dc into the next stitch.
- Repeat the fan stitch 6 times.
- Skip 2 sts and work a V stitch of dc, ch 2, dc to form the next corner.
- Continue repeating 6 fan stitches followed by 1 V stitch corner until 4 corners are created around the round.
- Sl st to close the round.
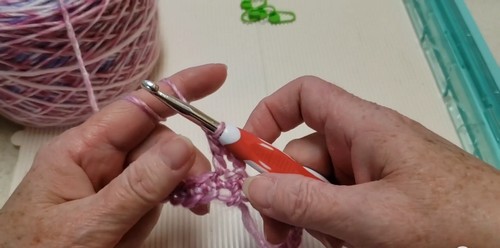
- If you’re a beginner and crochet patterns feel confusing, start with the video tutorial below, it’s the easiest way to learn as you go!
Increasing the Yoke — Rounds 3 to 5
- At every corner, work 2 V stitches separated by a ch 2 into the center corner space.
- Work fan stitches into the ch-2 spaces of the fan stitches from the previous round.
- Add cluster stitches of 3 dc worked together at the edges of the corner sections as the rows progress.
- Keep the center of each corner consistent: 2 V stitches separated by a ch 2 on every increase round.
- Sl st to close each round.

Separating the Sleeves
- Fold the piece along the corner markers to check chest width and armhole depth.
- Connect the front and back corner spaces with stitch markers to mark the underarm join points.
- When crocheting across each join, work a cluster stitch across both corner spaces to close the underarm and form the armholes.
- Continue working in rounds around the body only from this point forward.
Body
- Work 1 fan stitch into a cluster stitch followed by 1 sc into the next cluster stitch to control flare.
- Repeat fan stitches into fan stitches from the previous round.
- Continue working rounds until the top reaches your desired length.
- Sl st to close each round.
Finishing Touches
- Turn the garment inside out and sew the small underarm gaps closed for a secure, clean fit.
- Join yarn at the neckline and work 1 round of sc evenly around the neckline edge.
- Weave in all loose ends.
- Turn the top right side out.
Tips and Troubleshooting
- The neckline chain is twisting before I join it.
Before slip stitching the ring closed, lay the chain flat on a table and confirm all the chain bumps face the same direction. Joining a twisted chain means every round will be off. Take an extra moment here — it’s much easier to untwist a chain than to frog a full yoke later. - My yoke is too tight across the shoulders.
The yoke width depends on how many increase rounds you’ve worked and how consistently you’ve placed V stitches at the four corners. If the top feels snug after Round 3, work one additional increase round before separating the sleeves. Try it on before the underarm join — that’s the moment to add more rounds if needed. - The fan stitches look uneven.
Uneven fans are almost always a tension issue. If your dc stitches vary in height, your fans will too. Try consciously keeping each dc the same height by making sure your starting chain is the same size every time. A slightly larger hook for the fan rows can help if you naturally crochet tightly. - I lost track of which round I’m on.
Use a paper and pen tally or a row counter app. The yoke increases on Rounds 3–5 all look similar from above once you’re several rows in. Marking each completed round as you go is the simplest fix.
Yarn and Fiber Notes
Acrylic medium weight and sport weight cotton both work well here, but they produce different results. Acrylic has more stretch and bounce, which helps the yoke sit evenly and makes the top forgiving through the bust. Cotton has better drape and breathes well in heat — ideal if this is a true summer top. Cotton also holds stitch definition more crisply, which makes the fan stitch texture more visible. If you’re making this as a first garment, acrylic is more forgiving to work with; if you want the best wearability for hot weather, choose cotton.
Customization Ideas
- Length: Simply work more body rounds for a tunic; fewer rounds for a true crop. The body section has no fixed end point.
- Neckline: The single crochet edging round can be worked in a contrast color for a simple detail.
- Sleeves: The armhole openings can be picked up and worked into short cap sleeves after the body is complete.
- Hook sizing: Going up one hook size throughout gives a more open, drapey fabric; staying at the smallest hook produces a denser, more structured result.
FAQ
Do I need to know how to work in the round before starting this?
Not necessarily — this top teaches it as you go. The key skill is knowing how to join rounds with a slip stitch and chain up to begin the next. If you’ve only worked flat rows before, practice joining a small chain into a ring and working a few rounds of sc before you start the neckline. Ten minutes of practice makes a real difference.
What if the neckline is too small or too large?
The neckline size is set by the foundation chain. If it’s too small after joining, frog back and add more chains in increments of the stitch repeat. If it’s too large, reduce in the same way. Always check that the loop stretches comfortably over your head before working Round 1.
How do I know when the yoke is deep enough to separate the sleeves?
Fold the piece along the corner markers so the front and back sit together and measure the distance from the neckline down to the corner markers. This should match your desired armhole depth — typically 7 to 9 inches for an adult top, depending on your build. The pattern tells you to physically fold and check, which is exactly the right approach.
Can I use a different yarn weight?
Yes, but adjust your hook size to match and expect a different finished size. Going heavier closes the fan stitch spacing and produces a denser, thicker fabric. Going lighter opens it. Always swatch a few rounds of the fan pattern before committing to a full top.
What do I do if I run out of yarn mid-round?
Join new yarn at the start of a fan stitch rather than mid-stitch. Work the last pull-through of the final stitch with the new yarn, leaving a 6-inch tail on both ends to weave in. Avoid joining in the middle of a cluster — the structural join point needs a clean start.