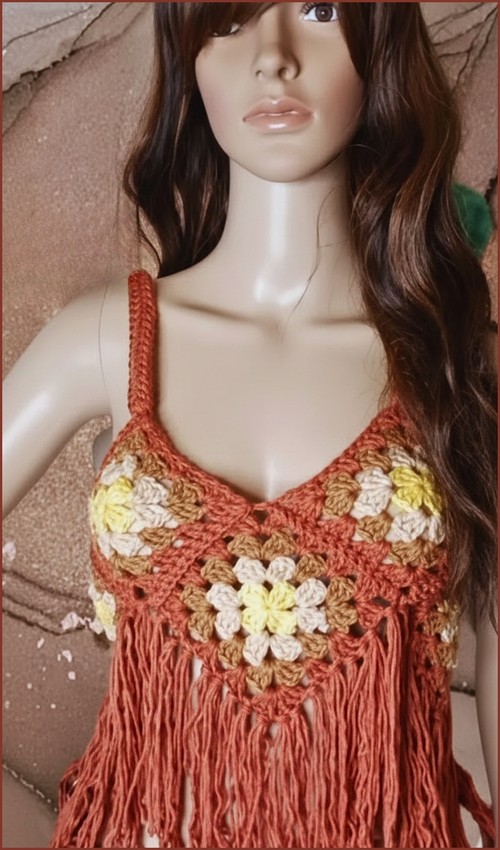
Crochet Fringe Top Outfit

This top is built from a small number of identical granny squares that are first turned into panels, then folded and shaped into a wearable garment. Understanding how the flat squares become a V neckline, armholes, and body will make the assembly stage feel logical instead of intimidating. Once the structure clicks, the rest is careful seaming and simple straps.
Materials
- Cotton yarn in 3 to 4 colors
- Crochet hook suitable for your yarn
- Scissors
- Tapestry needle

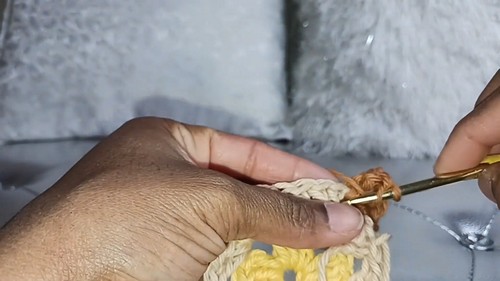
Creating the Granny Square
Make 8 squares total
These squares form the entire body of the top. All sizing and fit adjustments later depend on keeping the squares consistent, so it helps to work them all the same size and tension.
Round 1 The Center
- Make a slip knot and chain 4
- Slip stitch into the first chain to form a ring
This creates a stable center that keeps the square flat instead of pulling tight like a magic ring sometimes can with cotton yarn.
- Chain 3 and place 2 double crochets into the ring
- Chain 2 and place 3 double crochets into the ring
The chain 3 counts as the first double crochet of the round. Each group of three double crochets forms one corner cluster.
- Repeat the chain 2 and 3 double crochets two more times
- Chain 2 and slip stitch to the top of the starting chain
You should now have four clusters of three double crochets, separated by chain 2 spaces.
These chain spaces are your corners.
- Cut yarn
Cutting the yarn here keeps the color changes clean and prevents bulky joins later.
Round 2 The Corners
- Attach a new color to any corner space
- Chain 3 and place 2 double crochets in the same space
- Chain 2 and place 3 double crochets in the same corner
This builds height and definition in each corner, keeping the square shape crisp.
- In each remaining corner space work 3 double crochets chain 2 and 3 double crochets
- Slip stitch to the top of the starting chain
- Cut yarn
At the end of this round, the square is clearly defined, but still compact.
Round 3 and Round 4 Expanding the Square
These rounds increase the size evenly so all squares stay square and lie flat.
- Attach a new color to a corner space
- Work 3 double crochets chain 2 and 3 double crochets in the corner
- Work 3 double crochets in each side space between corners
The side spaces are the gaps between corner clusters from the previous round.
- Repeat the same pattern around the square
- Add one additional side cluster per round
Each new round adds length to the sides, which is what makes the square grow evenly.
- Slip stitch to close the round
- Cut yarn

After Round 4, all squares should be the same size. If one is larger or smaller, it is worth rechecking stitch counts now before assembly.
Assembly
This is where the flat fabric becomes a garment. Take your time here and lay everything out before sewing.
Seaming the Squares
- Place two squares right sides together
- Single crochet through both loops along one full side
Using single crochet creates a sturdy seam that also adds structure to the top.
- Repeat to create four panels with two squares each
You will now have four long rectangles.
- Lay the four panels side by side
- Single crochet the panels together vertically to form one wide piece
This wide piece will later be folded to create the neckline and armholes.
Folding for the Top Shape

- Lay the joined piece flat
Make sure all seams are facing the same direction for a neat finish.
- Fold the top corners of the front panels inward toward the center
This fold creates the V shape neckline. Adjust the angle slightly if you want a deeper or shallower V.
- Sew the folded edges to create the V shape neckline
- Continue seaming to form the armholes and body
Try the piece on or hold it up against your body as you seam to check placement before fully securing the stitches.
Adding the Straps
- Attach yarn to the top point of a front square
- Chain approximately 45 stitches or adjust for your size
The chain length determines how high or low the top sits on the body.
- Attach the chain to the corresponding point on the back
Check the fit before fastening off.
- Optionally single crochet across the chain to thicken the strap
This adds durability and prevents the strap from stretching out over time.
Fit and Sizing Guidance
This top is square-based, so sizing changes come from:
- Adjusting strap length
- Changing yarn weight or hook size
- Adding extra rounds to the granny squares before assembly
For more coverage or a longer top, increasing square size is more effective than adding more squares.
Stitch and Shaping Clarity
- Chain 2 spaces always indicate corners
- Side clusters fill the spaces between corners, never into stitches
- Each new round adds one side cluster per side
If a square starts to ripple, your hook may be too large. If it curls, the hook may be too small.
Beginner Notes
- Cotton yarn has less stretch, so consistent tension matters
- Lay squares flat after each round to check shape
- Count clusters, not stitches, to stay organized
Blocking the squares lightly before assembly can make seaming easier.
Troubleshooting
- Square is not flat: Check that each corner has chain 2 and that no side clusters were skipped.
- Neckline feels too open or too tight: Adjust how far inward you fold the front panels before seaming.
- Straps stretch out: Single crochet over the chain or use a tighter hook for the straps.
Finishing Notes
- Weave in all ends securely, especially at color changes and seams.
- Because cotton yarn is heavier, reinforced seams and straps will help the top hold its shape over time.
- Light blocking can help the final piece drape smoothly and sit comfortably on the body.