
Crochet Twist Top Pink
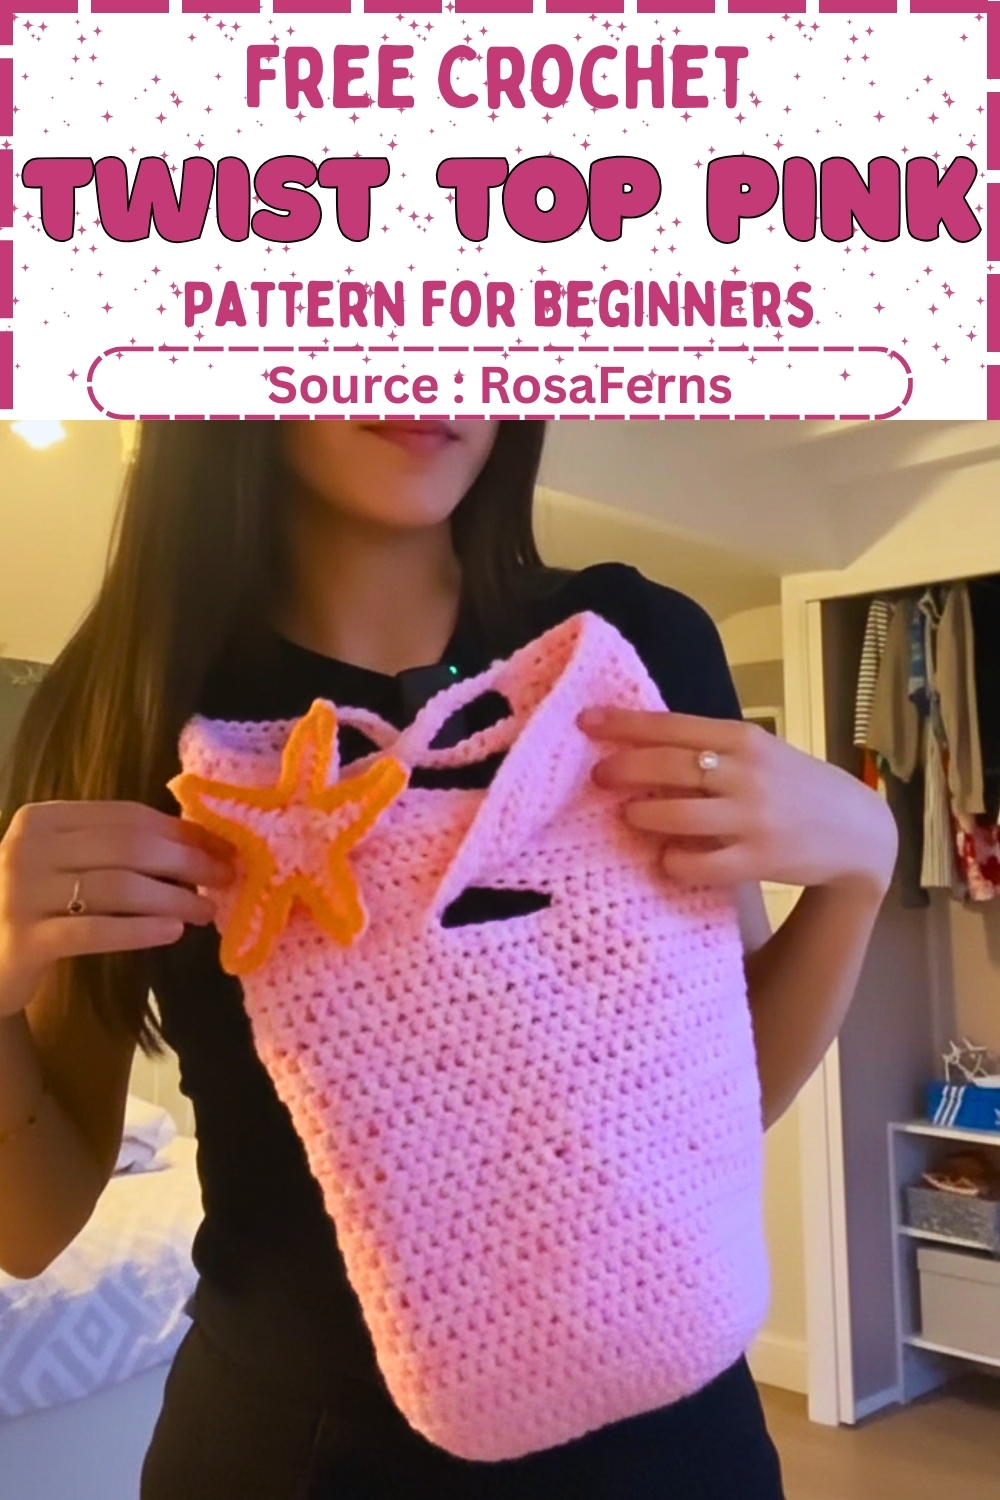
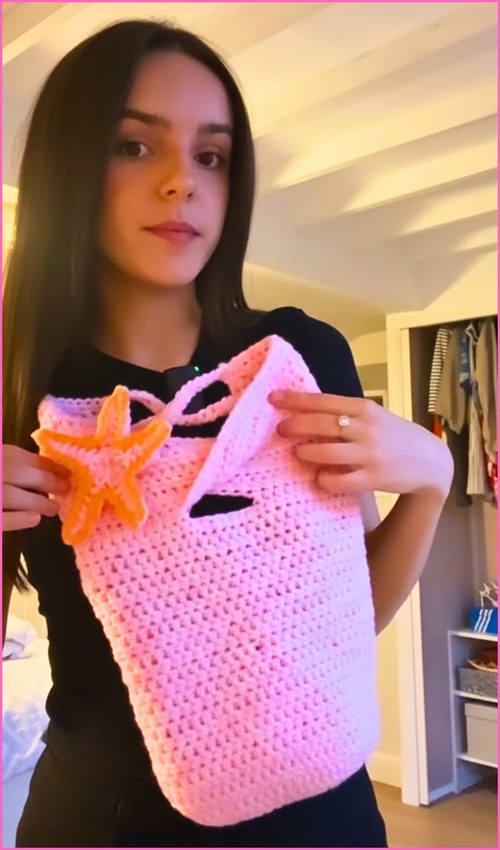
The starfish appliqué is worked separately and pinned or sewn on at the end, so you can reposition it or swap it out entirely if you want a cleaner look. Straps attach at the back once the main panel is done, keeping the front uninterrupted. If you want another quick beginner top that uses a single flat panel as its base, the crochet twist top back covers a similar construction with a different back finish.
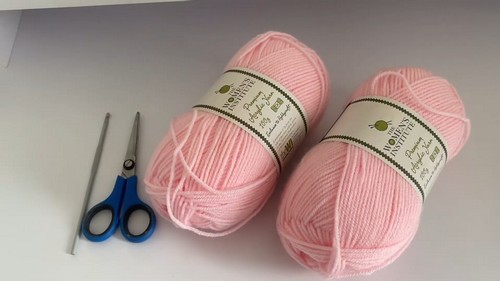
Materials
- Light weight yarn suitable for summer wear
- 4 mm crochet hook
- Scissors
- Yarn needle
Core Stitches Featured in This Pattern
The Top Panel
- Create a slip knot and chain a length that reaches from one armpit to the other
- Use your own measurement for sizing or chain approximately 50 stitches as a reference
- Half double crochet into each chain across for the first row
- Flip your work, chain 1, and half double crochet across every stitch
- Repeat rows until the panel is tall enough to fully cover the bust area
- Work approximately 15 rows or adjust as needed for coverage
Panel sizing and coverage notes
This panel determines both width and bust coverage, so take time here. The width should sit comfortably from armpit to armpit without pulling. The height should fully cover the bust when held against the body. If you prefer more coverage or plan to wear this as a standalone top, add extra rows now. It is much easier to adjust height before the twist than after.
- Don’t let crochet patterns intimidate you! If you’re a beginner, the video tutorial below makes it super easy to follow along!
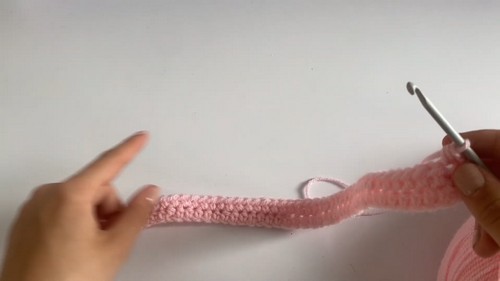
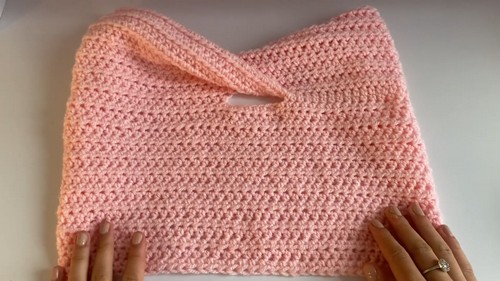
Creating the Twist
- Count the total number of stitches across your panel
- Calculate the middle gap by multiplying the total stitch count by 0.15
- Calculate the side stitches by subtracting the gap stitches from the total and dividing by two
- Half double crochet across the first side stitches
- Chain the calculated number of gap stitches
- Physically twist the entire crochet panel in the center
- Skip the middle stitches and half double crochet into the remaining stitches on the opposite side to secure the twist
Understanding the twist step
This is the most important and most confusing part of the top. The chained gap creates space that allows the fabric to cross over itself without puckering. When you physically twist the panel, make sure the edges stay aligned and the twist sits exactly at the center. The fabric should cross smoothly, not bunch. If it feels bulky, double check that you chained the correct number of gap stitches and did not accidentally work into the skipped center stitches.
A good check before continuing is to lay the piece flat and gently open the twist. Both sides should mirror each other.
Bottom Section
- Flip your work, chain 1, and half double crochet across all stitches including the chain gap
- Continue adding rows of half double crochet until the top reaches your desired length
- Stop when the top feels comfortable and balanced in proportion
Length and balance guidance
Because the twist shortens the visual length at the center, the bottom section helps rebalance the design. Try the top on or hold it against your body as you go. The goal is a length that feels secure without pulling downward on the twist. Adding rows gradually and checking often prevents overlength.
Lacing the Back
- Chain a long strap approximately 100 chains
- Single crochet back down the chain to create a thicker strap
- Repeat to make a second strap
- Lace the straps through the back edges of the top in a criss cross pattern
- Tie the straps securely in a bow
Fit adjustment notes
- The lace up back allows flexible sizing.
- If you are between sizes or want extra adjustability, make the straps slightly longer.
- When lacing, keep the tension even so the back edges sit flat and do not gap.
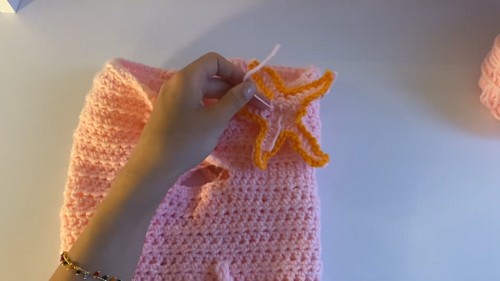
Optional Starfish Decoration
- Chain 3 and work 10 half double crochets into the first chain to form a small circle
- Slip stitch to join the round
- Chain 8 to begin the first arm
- Slip stitch into the second chain from the hook
- Single crochet into the next chain
- Half double crochet into the next chain
- Double crochet into each of the remaining chains
- Skip one stitch on the center circle and slip stitch into the next stitch
- Repeat this process until five arms are completed
- Slip stitch around the entire starfish using a contrasting color
- Attach the starfish to the center front of the top using slip stitches or a yarn needle
Decoration tips
- Work the starfish with relaxed tension so the arms curve naturally.
- When attaching, secure it firmly at the center twist area so it sits flat and does not pull the fabric out of shape.
Stitch and Technique Notes
- This pattern relies entirely on half double crochet for structure and stretch.
- Consistent stitch height is important, especially through the twist section.
- If your stitches vary in height, the twist may look uneven.
- Slowing down during the center rows helps maintain symmetry.
Beginner Notes
- If you are newer to garment crochet, practice the twist step on a small swatch first.
- Twisting fabric feels unfamiliar at first, but once you see how the panel locks into place, the construction becomes much clearer.
Troubleshooting
- Twist looks bulky: Check that the gap stitch count is correct and that you skipped the center stitches properly.
- Top feels too tight across the bust: Add width by chaining more stitches at the start rather than adding stretch later.
- Bottom section pulls downward: Reduce the number of rows or loosen your tension slightly.
Finishing Notes
- Weave in all ends carefully, especially around the twist and lace up areas, where movement is highest.
- Lightly block if needed to smooth the fabric, but avoid stretching the twist itself.
- This top works best when the structure is respected and adjustments are made slowly.
- Take your time, check fit often, and let the construction guide you.


