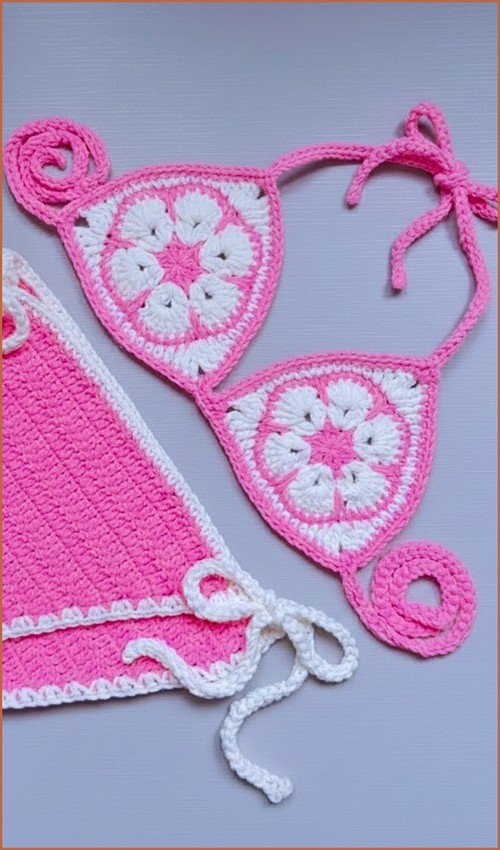
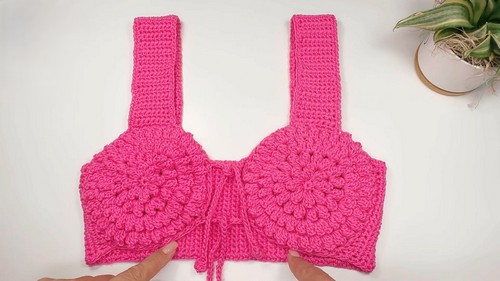
The fringe trim is what gives this top its festival feel a single row of cut yarn loops along the bust line that takes about ten minutes to add but completely changes the vibe. The scallop hem echoes the rounded shaping of the granny squares without competing with them. For the granny square construction itself, the granny stitch tutorial covers the 3-dc cluster repeat that forms each cup panel here.
Materials
- Fingering weight cotton yarn approximately 50 g
- 2.25 mm crochet hook or larger hook for looser drape
- Scissors
- Yarn needle
- Optional contrasting yarn for decoration
Stitch Cheat Sheet
Pattern Overview
This top is made from five separate motifs:
- 2 full squares for the center front
- 3 half squares to shape the sides and lower edge
Each motif starts with a dense circular center and gradually transitions into structured corners and lighter mesh rows.
This balance of solid stitches and openwork keeps the fabric stable while still breathable.
The shaping happens naturally through:
- Puff and cluster stitches for texture
- Corner stitch groupings to maintain square geometry
- Mesh rows to relax the fabric and add drape
- Still getting the hang of reading crochet patterns? That’s completely okay, the video tutorial below breaks everything down in a simple, beginner-friendly way!
Full Square Instructions

Make 2
How the Square Is Built
- The full square begins as a flat circle and is squared off gradually using stitch height changes and defined corners.
- Early rounds are dense to stabilize the center, while later rows introduce mesh for flexibility.
Step Clarification
- Magic ring and first round: Starting with 16 double crochets creates a firm, even center that prevents puckering later when heavier stitches are added.
- Working into back loops: Puff stitches worked into back loops add texture while leaving the front loops free, which helps later rounds sit flatter.
- Puff and cluster rounds: The chain spaces between puff and cluster stitches act as planned expansion points.
- These spaces are important they are where corner shaping will later develop.
Corner formation:
- Using half double crochet, double crochet, and triple crochet in the chain spaces gradually pushes the square into shape without abrupt increases.
- The corner formula 3 triple crochets, chain 2, 3 triple crochets creates a clear turning point and keeps edges straight.
Stabilizing round: Working half double crochet evenly around smooths the shape and prepares the fabric for mesh rows.
- Mesh and alternating rows: Mesh rows lighten the fabric and add drape. Alternating them with solid single crochet rows prevents the square from stretching out of shape.
- Final single crochet row: This locks the edges and gives a clean, join-friendly finish.
Half Square Instructions

Make 3
Purpose of the Half Squares
The half squares are used to create shaping without adding bulk.
They allow the top to angle downward in the center and sit more naturally on the body.
Step Clarification
- Smaller starting round: Beginning with 8 double crochets instead of 16 keeps the half square proportional to the full square once expanded.
- Turning rows instead of joining: Working back and forth rather than joining rounds allows the piece to remain flat and prevents twisting along the straight edge.
- Back loop puff stitches: These mirror the texture of the full squares so all pieces visually match when assembled.
- Shaping row with mixed stitch heights: Triple crochet, double crochet, and half double crochet are used intentionally to slope the fabric toward the straight edge while maintaining a squared outer edge.
- Center corner: The 3 triple crochets, chain 2, 3 triple crochets in the center creates the angled point that fits neatly between the full squares.
- Sizing match: Continue alternating half double crochet, mesh, and single crochet rows until the outer edges of the half square match the edge length of the full squares exactly. This step is critical for clean assembly.
Assembly Guidance
- Lay all pieces out flat before joining.
- Place two full squares side by side as the center.
- Insert one half square between them, with the point facing downward.
- Position the remaining two half squares on the outer sides.

Joining Tips
- Join using slip stitches through the back loops on the wrong side.
This creates a subtle seam on the inside and keeps the front surface clean. - Keep tension relaxed while joining to avoid pulling the motifs out of shape.
Bottom Border
- The initial double crochet row evens out the bottom edge and fills any gaps created by angled joins.
- The mesh row adds visual lightness and matches the openwork used in the motifs.
Straps
- Chaining approximately 150 stitches creates long, adjustable straps.
- Slip stitching back along the chain firms it up, preventing stretch and making the straps durable for wear.
You can adjust strap length easily before attaching by testing the fit on the body.
Decorative Edging Optional

Fringe:
- Attaching yarn scraps to front loops adds movement and color without affecting structure.
Shell stitch finish:
- A final shell stitch row along the neckline softens the top edge and provides a decorative frame that balances the geometric construction.
Fit and Sizing Notes
- This top is naturally adjustable due to open mesh rows and long straps.
- Using a larger hook will increase drape and overall size slightly.
- Keep square edge lengths consistent to avoid puckering during assembly.
Beginner Notes
- If puff or cluster stitches feel tight, loosen your tension slightly or use a larger hook just for those rounds.
- Count stitches at corners carefully corners control the entire shape of the piece.
Troubleshooting
- Square curling: Add a looser mesh row or check corner stitch counts.
- Uneven joins: Reblock motifs lightly before assembly.
- Top feels stiff: Increase hook size for mesh rows only.
Finishing
Weave in ends carefully along stitch paths to keep them invisible from the front. A light steam block can help settle the texture and even out joins without stretching the fabric.