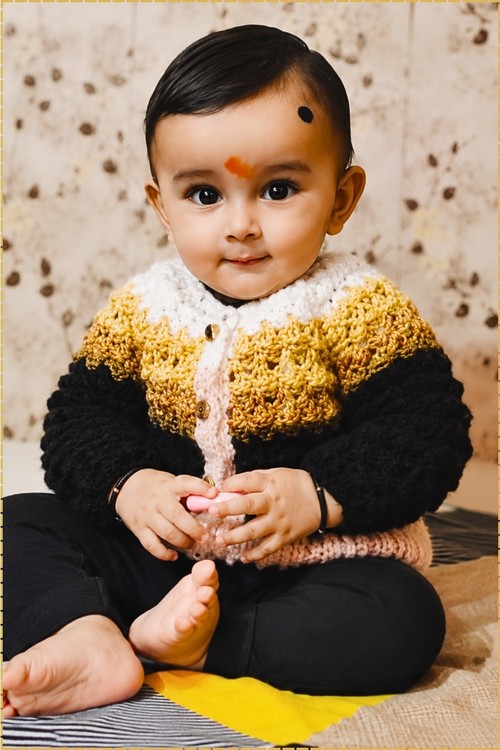
At first birthday parties and photo shoots, a bulky yarn crochet baby sweater with a fluffy white collar keeps little ones warm. Gift bags for a baby shower get an easy upgrade from the free chunky baby sweater crochet pattern, sized from 6 months to 2 years for boys or girls.
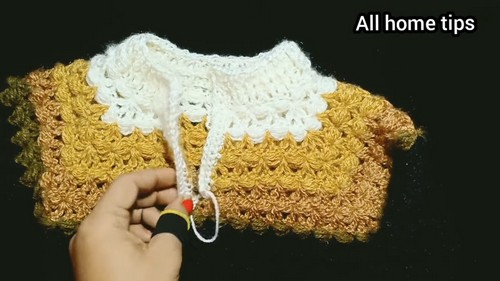
White at the collar, mustard shells across the yoke and solid black through the body and sleeves. This bulky crochet baby sweater packs three colors and two textures into one small cardigan, and the chunky yarn means it works up fast enough to finish before the size window closes. Anyone who has already made the baby sweater in the roundup will recognize the top down yoke approach even if the stitch is different.
Bulky Crochet Baby Sweater
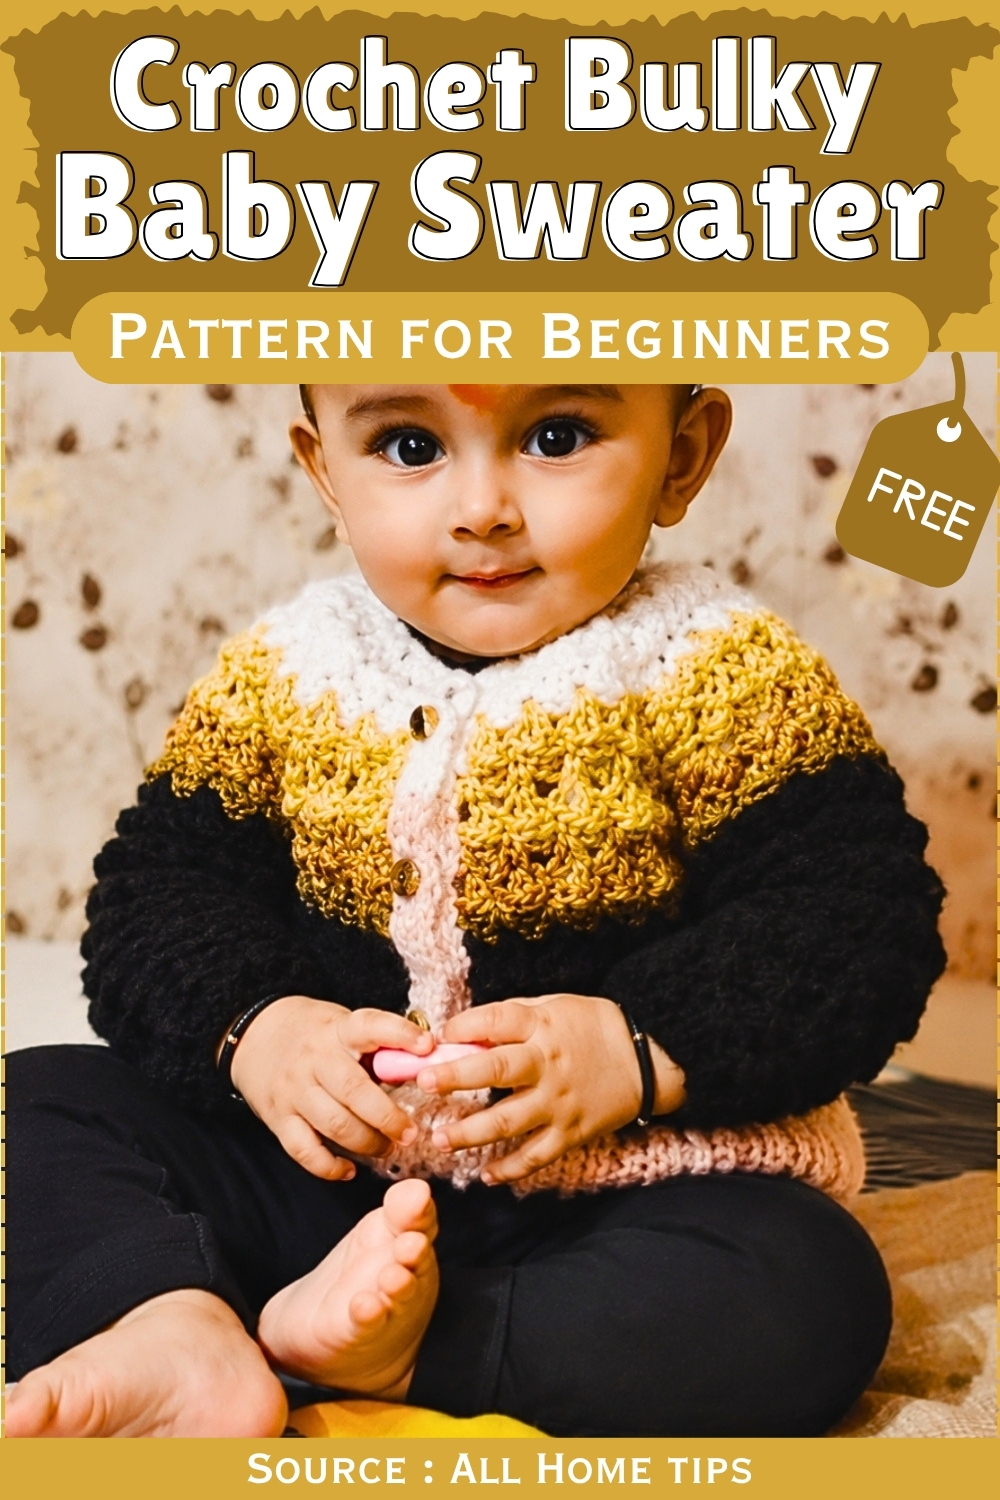
The yoke is where the detail lives. Shell clusters fan out from the neckline and create an open lacy band across the shoulders before the body switches to a dense solid stitch that adds warmth without extra bulk. Gold buttons run down the front placket and a simple drawstring finishes the neckline, so the fit is adjustable as the baby grows.
Difficulty and Time
- Skill level: confident beginner moving into advanced beginner
- New skills you may pick up: puff stitch, front post and back post double crochet ribbing, buttonhole placement
- Typical make time: two to four relaxed sessions, depending on how fast the pattern rhythm clicks
- Construction: worked top down from a completed yoke, then joined at the underarms and worked down in rows
- Seaming: minimal, just a small neckline adjustment and sewing down the placket base
- Note: this is Part 2 of the build. The yoke section from the top of the neck down to the armholes should already be worked before you start here
Materials and Tools
- Main color yarn for the body and sleeves
- Off white yarn for the hem ribbing, cuffs, plackets, and neckband
- A crochet hook that gives you a soft, drapey fabric with your chosen yarn, plus a 3.5 mm hook if you are sizing up to 2 years
- Two small buttons
- Yarn needle for weaving in ends and closing the neckline gap
- Safety pins or stitch markers to hold the front corners of the yoke
- Scissors
- A measuring tape
Begin with This Stitch
Stitch Abbreviations Used
- ch: chain
- sc: single crochet
- hdc: half double crochet
- dc: double crochet
- FPdc: front post double crochet
- BPdc: back post double crochet
- V stitch: 1 dc, ch 1, 1 dc worked into the same space
Sizing and Fit
This sweater is written for roughly 6 months to 1 year, which in practice fits most babies around the 9 to 10 month mark comfortably. To take it up to a 2 year size, switch to a 3.5 mm hook and work the armhole section for 9 rows instead of 7 before joining. Everything else stays exactly the same. Because the body is worked in a repeating two row pattern, length is easy to control: just stop the alternating rows earlier for a cropped fit or add another pair for extra coverage. The ribbed hem and cuffs pull in slightly, which is what gives the sweater its tidy finished shape.
Beginner Technique Notes
- The two stitches doing most of the work here are simple once you see them clearly. The V stitch is just 1 dc, ch 1, 1 dc all worked into the same space, and it creates the open, stretchy foundation the puffs sit on. The puff stitch is built inside a single crochet: you chain, then pull up loops three times in that same spot before closing everything off. Keep those loops tall and even and the puffs will stand up on their own. The post stitches in the ribbing are worked around the stitch rather than into the top of it, which is what makes the hem stretch and recover.
- Work the puff stitch rows from the front of the garment and the V stitch rows from the back, and the texture pops outward the way it should. If you work them from whichever side happens to be facing you, the puffs alternate direction and the surface goes flat and busy. It is the single easiest thing to get right and the easiest to forget. Keep your hook loose on the puff loops, because that is where beginners tend to strangle the stitch and end up with a hard little knot instead of a soft bubble.
The Pattern
Before You Begin
- Have the yoke section complete, worked from the top of the neck down to the armhole point, with 7 rows finished for the 6 to 12 month size
- Work 9 rows here instead of 7 if you are making the 2 year size
- Locate the safety pins marking the front corners where the yoke ends
- Have the front and back pieces sitting flat and untwisted before you attach yarn
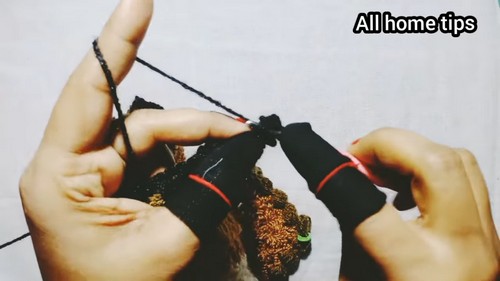
Joining the Armholes
- Remove the safety pin from the front right corner
- Attach the main color yarn at that corner, working from the front side of the garment
- Ch 4, then work 1 dc into the same stitch to set up the first V stitch
- Skip the chain spaces as established and work 1 dc, ch 1, 1 dc into each pattern space across
- Continue this V stitch row all the way to the opposite safety pin marker
- Ch 1 and turn to begin the puff stitch row
- Work 1 sc into the first space
- Ch 3, then pull up a loop 3 times inside that same single crochet to form the puff, and close it off with an sc
- Repeat the puff sequence across the row, working one puff into each space
- Work the extra puff row as written rather than skipping it, since it is what rounds out the neckline and keeps it from sitting tight
If you’re still learning how to read crochet patterns, no stress! Follow the video tutorial below and use the written pattern below as you get more comfortable!
Locking In the Sleeves
- Skip across the stitches that form the sleeve opening without working into them
- Bring the front and back corners of the body together at the underarm
- Join them with a single crochet at each armhole corner to lock the openings in place
- Work the V stitch row across the joined body loop to secure the join
- Continue on from here working the body as one piece
Body Length
- Alternate the two pattern rows all the way down: one V stitch row of 1 dc, ch 1, 1 dc, then one puff stitch row
- Work the puff rows from the front side and the V stitch rows from the back side so the texture sits proud on the outside
- Continue for about 8 rows of the alternating pattern
- Check your total length as you go, which will fall roughly between 13 cm and 27 cm depending on your tension and size
- Once the body is the length you want, take a yarn needle and stitch the front neckline gap slightly closed if it is sitting too wide
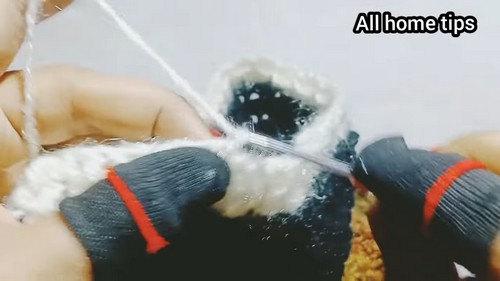
Lower Body Ribbed Border
- Switch to the off white yarn and attach it at the bottom hem
- Work a foundation row of single crochets evenly across the hem
- Place 2 sc into the larger spaces and 1 sc into the smaller stitches so the edge lies flat without ruffling or pulling
- Ch 3 to turn, then work 1 dc into every stitch across
- Ch 2 to turn to begin the ribbing
- Work 2 FPdc around the posts of the stitches from the front, then 1 plain hdc
- Repeat that sequence of 2 FPdc and 1 plain hdc all the way across the row
- On the following rows, match the stitches as they appear: work post stitches over post stitches, front or back as they present themselves, and plain hdc over plain hdc
- Work a few rows of ribbing until the hem has the depth you like, then fasten off
Sleeves
- Begin at the armhole opening, working into the 13 pattern repeats left open there [13 stitch repeats]
- Attach the main color yarn and work the same alternating V stitch and puff stitch pattern down the sleeve
- Taper the sleeve by decreasing on alternating rows only, never on every row
- To decrease, substitute the V stitch at the edge with a half double crochet
- Work the first row with 12 puffs [12 puff stitches]
- Work the second row keeping 12 puffs with no decrease [12 puff stitches]
- Work the third row decreasing down to 11 puffs [11 puff stitches]
- Carry on in that rhythm, holding a row and then decreasing, until the sleeve tapers to your liking
- Continue for about 7 to 8 rows of the puff and V stitch pattern, reaching roughly 15 cm in sleeve length
- Switch back to the off white yarn for the cuff
- Work a foundation row of single crochets, alternating 1 sc and 2 sc into the stitches to gather the cuff in slightly
- Work 1 row of plain double crochets across
- Work the ribbing pattern of 2 front post stitches and 1 plain hdc for 3 to 4 rows
- Fasten off and weave in the ends
- Repeat the entire sleeve process exactly the same way for the second sleeve
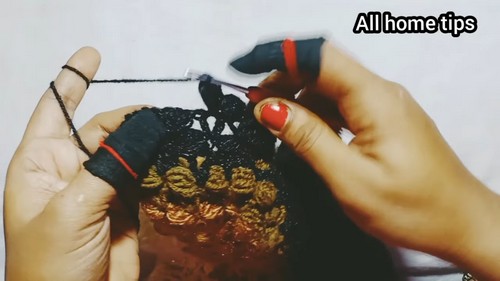
Front Button Plackets
- Attach the off white yarn along one side of the front opening
- Work single crochets uniformly up that edge, spacing them evenly so the placket does not pull or flare [about 17 to 19 single crochets]
- Work 3 rows of single crochet in total to complete the solid under placket
- Move to the opposite front edge and work the first row of single crochets the same way
- On the second row, create the buttonholes: ch 2, skip 2 sc, then work single crochets in between to space them out
- Make 2 buttonholes on this row, sized for small buttons
- Work 1 more row of single crochet, placing 2 sc over each chain space to frame the buttonholes neatly
Neckband and Collar Trim
- Work a final border row around the neckline that matches the ribbing texture of the hem and cuffs
- Work front post stitches and plain single crochets according to how the stitches beneath line up
- Keep the tension slightly firm here so the neckline holds its shape
Final Assembly
- Overlap the two front plackets, with the buttonhole side resting on top
- Sew the base of the overlapping placket down securely with a yarn needle
- Attach the buttons to the under placket, lining them up with the buttonholes
- Weave in all remaining loose ends
- Give the sweater a gentle press or block if your yarn allows, and it is finished
Tips and Troubleshooting
- Keep the puff loops long and loose. If your puffs look tight and knotted rather than soft and rounded, your yarn is being pulled too snug on the loop pull ups.
- Always work the puff rows from the front and the V stitch rows from the back. Flip this even once and you will see a flat band in the middle of the texture.
- Count your pattern repeats at the end of every row for the first few rows. Losing a single V stitch at the edge is the most common cause of a body that narrows unexpectedly.
- Do not skip the extra puff row at the neckline. It is doing real work, opening the neck so the sweater goes over a baby’s head without a struggle.
- When you place the hem foundation row, judge each space by eye. Two single crochets into a wide space and one into a tight stitch is what keeps the hem flat instead of wavy.
- Mark your decrease rows on the sleeve with a scrap of yarn. Because you only decrease on alternating rows, it is easy to lose track and taper too fast.
- Try the sweater on the baby, or against a garment that fits, before you commit to the hem ribbing. Length is the easiest thing to adjust and the hardest to undo later.
- Sew your buttons on last, after the plackets are overlapped and pinned. Marking the button positions through the actual buttonholes guarantees the front closes straight.
- If one front edge looks longer than the other, your placket single crochets are unevenly spaced. Pull the row back and redistribute rather than trying to correct it on the next row.
- Weave your ends in along the back of the post stitch ribbing, where the dense texture hides them completely.
Yarn Substitution
Choose a yarn with body and a bit of loft, since puff stitches need something to bloom into. Smooth, plied yarns show the texture best, while heavily fuzzy or halo yarns will blur the puffs into a soft mass. Acrylic and acrylic blends are the practical choice for baby gifts because they wash and wear well, but a soft merino or a cotton blend gives a lovely drape if the sweater is for gentler use. Whatever you pick, work a small swatch of the alternating pattern first. If the fabric feels stiff, move up a hook size before committing to the whole yoke.
Customization Ideas
- Work the body in one color and the trim in a contrast shade, or reverse it for a bolder look
- Add a third color as a single stripe near the hem for a subtle detail
- Extend the ribbing at the hem and cuffs for a chunkier, more structured finish
- Lengthen the sleeves by adding a pair of pattern rows before the cuff for cooler weather
- Make it a lighter layer by stopping the body a couple of rows early for a cropped, vest style fit
- Swap the two small buttons for wooden or shell buttons to shift the whole feel of the sweater
- Skip the buttonholes entirely and sew the plackets closed for a simple pullover
- Work the whole sweater in a heathered or tweed yarn so the texture reads softer and more rustic
Frequently Asked Questions
- What size does this sweater fit, and how do I make it bigger? It is written for roughly 6 months to 1 year, which comfortably fits most babies around 9 to 10 months. For a 2 year size, use a 3.5 mm hook and work 9 armhole rows instead of 7. Everything else stays the same.
- Why do my puff stitches look flat instead of rounded? Almost always tension. The loops pulled up inside the single crochet need to be tall and loose. If you pull them snug as you go, the puff closes into a hard knot rather than a soft bubble. Try the same puff with a looser hand and compare the two.
- Do I have to work this from a completed yoke? Yes. This section picks up where the top down yoke ends, at the armhole point with the front corners marked. The body, sleeves, and finishing all depend on that base being in place before you attach yarn.
- My neckline feels too tight. Can I fix it after the fact? Partly. The extra puff row at the neckline is what opens it up, so skipping it is the usual cause. If the neck is already worked and slightly snug, keep the neckband trim looser and avoid pulling the final border row tight. If it is too wide instead, close the front gap slightly with a yarn needle as the pattern directs.
- Can I make this a pullover instead of a button front? You can. Work both front edges with the three plain single crochet rows and leave out the buttonholes entirely, then sew the plackets closed and carry the neckband trim across the join. Just check that the neck opening still stretches enough to pass over the head before you sew anything permanently.