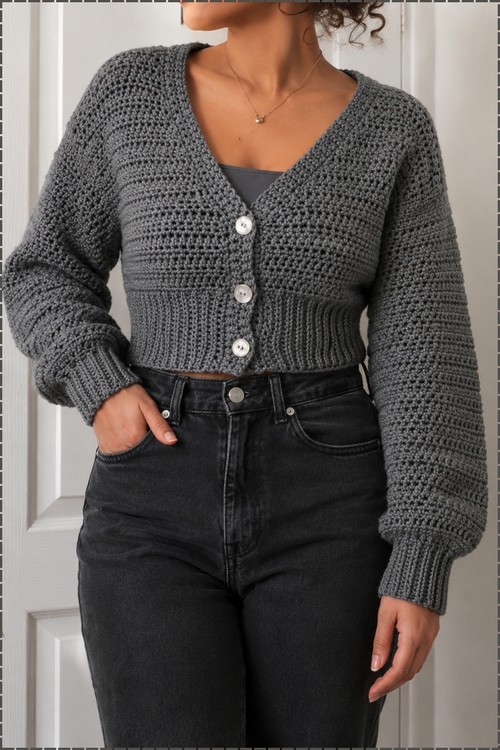
A cropped grey crochet cardigan gets its Y2K look from a deep V neckline, three-button front, and softly puffed sleeves. Worked top down in panels, it pairs dense half double crochet fabric with ribbed cuffs and waistband for a shaped finish.
Three large buttons run down the center front of this cropped cardigan and sit against a v-shaped neckline that deepens as the fronts are worked outward from the yoke. The body fabric is dense enough to hold structure without lining, and the ribbed waist band and cuffs pull each edge in to give the silhouette shape without any shaping rows built into the pattern. Anyone who has finished a cropped crochet sweater before will find the yoke-down logic here easy to follow.
Y2k Crochet Cropped Knit Sweater
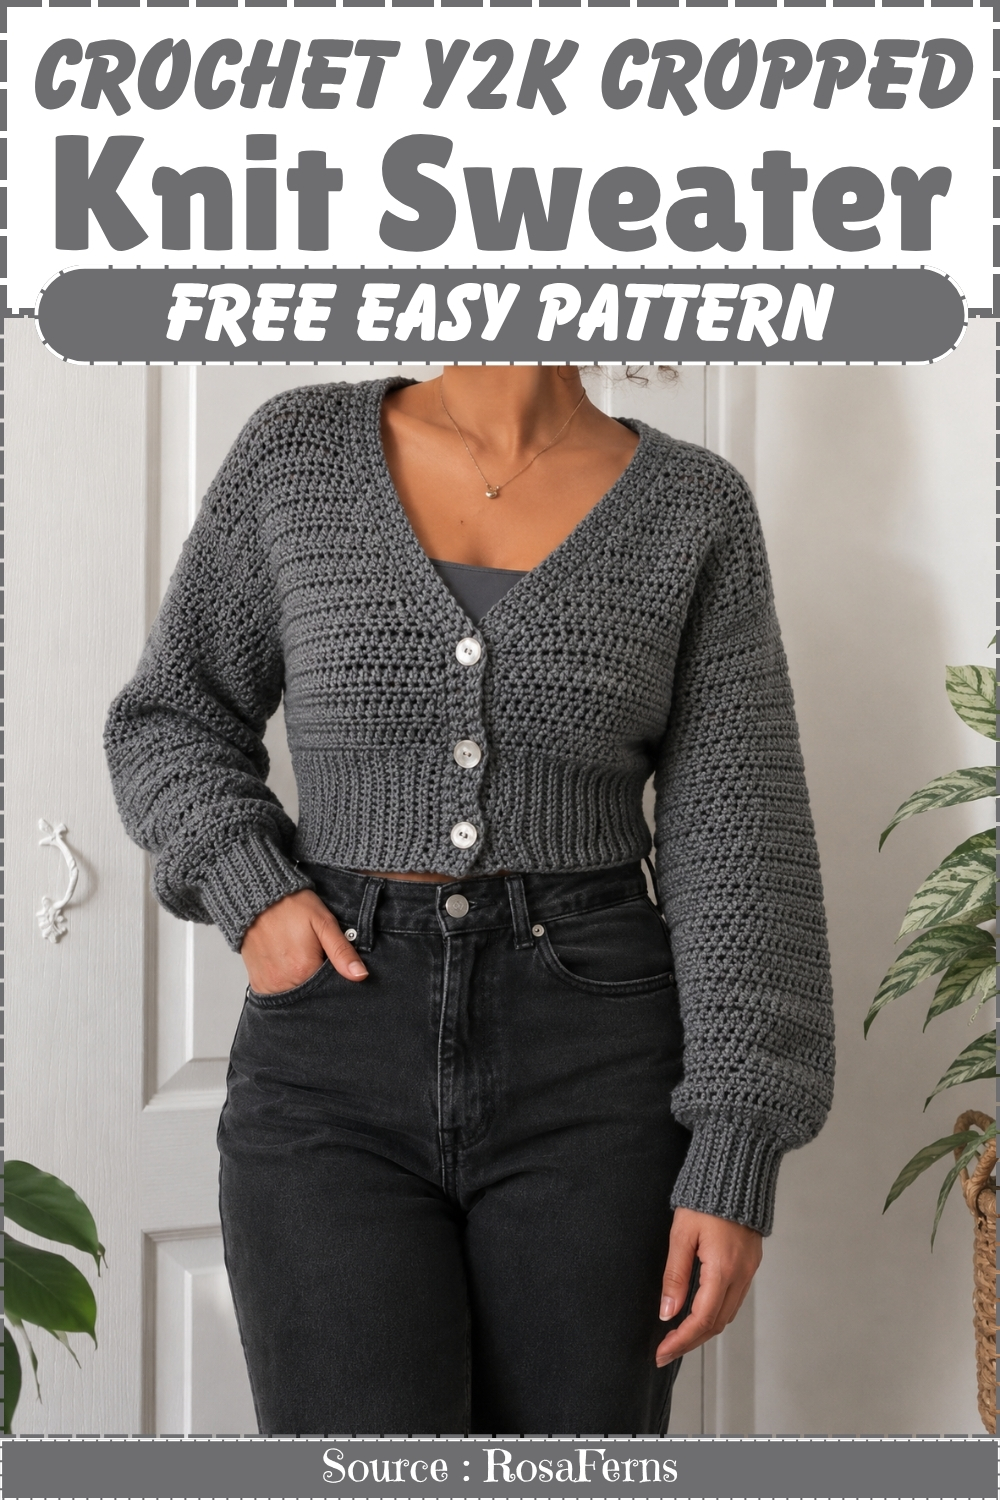
Grey colorway in the tutorial keeps the button detail readable against the fabric and photographs cleanly indoors. Construction works the body in one piece from the top before splitting for the two fronts at the v-neck opening. Puff sleeves come from increases worked at the sleeve cap rather than from any shaping at the cuff, so the volume sits at the shoulder and tapers naturally toward the wrist band.
Materials & Tools
- Yarn of your choice (a smooth worsted or DK weight works beautifully here)
- 5 mm crochet hook — used for the ribbing
- 6 mm crochet hook — used for the body and sleeves
- Stitch markers or safety pins
- Buttons (enough for your button band, plus one extra just in case)
- Darning needle or yarn needle for seaming and sewing buttons
Useful Stitch to Learn
Difficulty & Time
This is a solid intermediate project. The individual stitches are easy — back-loop slip stitches, half double crochets, and single crochets — but the construction involves panel shaping, neckline decreases, sleeve increases, and seaming, all of which reward patience and careful counting. Give yourself a week or two of regular sessions. It’s a project that builds beautifully and finishes with a real sense of accomplishment.
Beginner Technique Notes
- If you’re stretching into intermediate territory with this pattern, these techniques are the key ones to get comfortable with before you start.
- Back-loop only slip stitches (for the ribbing). Every row of the waistband and cuffs is worked by inserting your hook only under the back loop — the loop farthest from you — of each stitch. This is what creates the vertical ridges that look like knitted ribbing. Work these with a relaxed tension so the ribbing stays stretchy.
- Half double crochet two together (decrease). To shape the neckline, you’ll work two stitches into one by half-completing the first stitch (yarn over, insert hook, pull up a loop — three loops on hook), then starting the second in the next stitch the same way (five loops on hook), and finally yarning over to pull through all five at once. This neatly removes one stitch and angles the edge inward.
- Half double crochet increase. For the sleeves, an increase simply means working two half double crochets into the same stitch. That’s all — two stitches out of one.
- Splitting into panels. At the neckline, you’ll place stitch markers to divide all your stitches into three sections — left front, back, and right front. After that, you work each panel separately. It looks complicated on paper but becomes very clear once you have the markers in.
The Pattern
Step 1: Bottom Ribbing
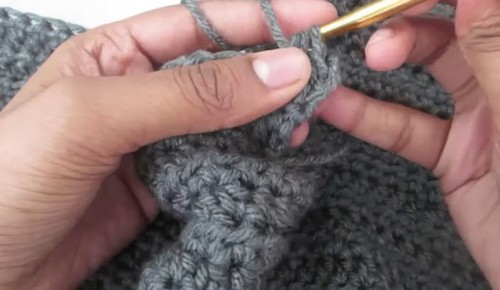
- Using the 5 mm hook, create a slip knot and chain 15.
- Turn your work 90°, skip the turning chain, and work 14 back-loop-only slip stitches down the row.
- Chain 1, turn, and continue making rows of 14 back-loop-only slip stitches.
- Repeat until you have 105 rows total, or until the piece wraps comfortably around your waist.
Step 2: Body Foundation
- Switch to the 6 mm hook, chain 1, and turn your work 90°.
- Work half double crochets into the top of each row along the ribbing edge, alternating between the indented and raised rows as you go. You should end up with around 105 half double crochet stitches.
- Chain 2 and turn.
- Work 8 rows of standard half double crochets, or more rows if you’d like a longer cardigan.
If you’re new to reading crochet patterns, don’t worry, just follow along with the video tutorial below and use the written pattern as a reference!
Step 3: Neckline Shaping & Panel Splitting
Neckline shaping rows:
- Chain 2 and turn.
- Half double crochet two together at the very beginning of the row (decrease).
- Half double crochet across until 2 stitches remain, then half double crochet two together.
- Chain 2, turn, and repeat this exact shaping row once more.
Splitting into panels:
- Count 24 stitches in from one edge and place a stitch marker in the 25th stitch. Repeat on the other side.
- This divides your work into a left front panel, a right front panel, and a back panel in the center.
Step 4: Working the Panels
First Front Panel:
- Chain 2 and turn, then half double crochet across until you reach the stitch marker.
- Keep working rows while continuing the neckline decreases (half double crochet two together at the neck edge) every alternate row until you have completed 12 rows total of neckline shaping.
- Work 5 straight rows of standard half double crochet. Fasten off.

Back Panel:
- Attach your yarn at the first stitch marker using a slip knot join.
- Work a row of half double crochets across to the second stitch marker.
- Chain 2, turn, and work a total of 17 rows of half double crochets. Fasten off.
Second Front Panel:
- Attach yarn at the other stitch marker.
- Repeat the exact same instructions as the first front panel — 12 rows with neckline shaping decreases, followed by 5 straight half double crochet rows.
Step 5: Joining the Shoulders
- Line up the front panels onto the back panel at the shoulders.
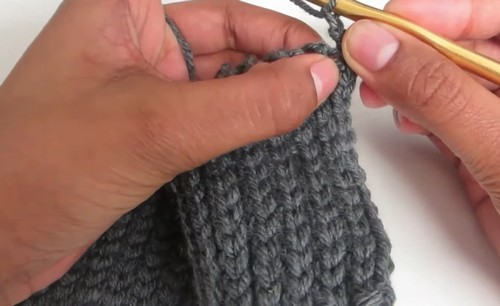
- Join them together either by sewing with your darning needle or by crocheting a row of single crochets across the top edge.
Step 6: Making the Sleeves (Make 2)
Sleeve ribbing:
- Using the 5 mm hook, chain 11.
- Work 10 back-loop-only slip stitches down the row, chain 1, and turn.
- Repeat until you have 29 rows of ribbing, or enough to wrap comfortably around your wrist.
Sleeve body:
- Switch to the 6 mm hook, chain 1, and turn 90°. Half double crochet evenly into the top of every row.
- Increase row: Chain 2 and turn. Work 1 half double crochet, 1 half double crochet, then 2 half double crochets into the next stitch (an increase). Repeat this pattern across the row.
- Sleeve shaping (repeat 7 times):
- Row 1: Half double crochet across until 1 stitch remains, then work 2 half double crochets into the last stitch (increase).
- Rows 2–5: Half double crochet across normally.
- Fold the sleeve in half lengthwise and sew or single crochet the seam shut. Turn right-side out.
Step 7: Attaching the Sleeves
- Turn the main cardigan body wrong-side out.
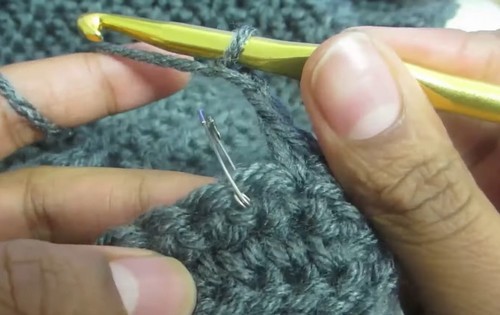
- Insert the sleeve inside the armhole with right sides facing together, matching the bottom seam of the sleeve to the armpit.
- Pin securely and attach using a blanket stitch or single crochet method. Repeat for the second sleeve.
Step 8: Neckline Trim & Button Band
Trim setup:
- Place stitch markers at the points on both sides where the neckline begins angling inward.
- Trim Row 1: Attach your yarn at a front corner using the 6 mm hook. Single crochet evenly along the entire front opening and neckline. At each stitch marker, work 3 single crochets into that single stitch to help the border turn smoothly.
- Trim Row 2: Chain 1, turn, and single crochet all the way across.
Buttonhole row:
- Mark where you want your buttons along the band.
- Single crochet until you reach a marker, then chain 2, skip 2 stitches, and single crochet into the 3rd stitch. Adjust the chain count to suit your button size. Repeat at each button marker.
- Final trim row: Single crochet one last row across the entire border, working normally over the buttonhole chains.
- Finishing: Sew your buttons onto the opposite front panel, aligned with the buttonholes.
Tips & Troubleshooting
- Keep your ribbing relaxed. Back-loop slip stitches tighten quickly. Work them with a deliberately loose tension — tighter-than-usual ribbing is the most common frustration with this type of waistband.
- Count your ribbing rows against your body before moving on. The ribbing wrapping your waist is the sizing anchor for the whole cardigan. Check the fit before you pick up stitches for the body.
- Mark your panels before splitting. Double-check your stitch counts and place markers carefully before working the front and back panels separately — uneven panels that don’t line up at the shoulder are much easier to prevent than fix later.
- Seam the sleeves with matching yarn and a loose hand. A tight seam puckers. Work it slowly, matching stitch to stitch, and your set-in sleeve will look cleaner than you might expect.
- Test your buttonhole size before working the whole band. Chain over a button before you commit to the buttonhole row. Two chains suit smaller buttons; three may be needed for chunky ones.
Yarn Substitution
Any smooth, round yarn in a worsted or DK weight will give you that knit-like surface texture that makes this cardigan look so polished. A wool or wool blend adds structure and warmth, which suits the cropped, fitted style beautifully. Cotton works well for warmer climates but has less stretch, which can make the ribbing stiffer — a touch of elastane in a cotton blend helps. Avoid very fluffy or halo yarns here: the texture hides the stitch definition that gives this cardigan its clean, knit-look appearance.
Customization Ideas
- Cardigan length: Work more body rows before the neckline split for a longer, hip-grazing version.
- Sleeve length: Adjust the number of sleeve shaping repeats and straight rows for a shorter or longer sleeve.
- No buttons: Skip the buttonhole row and work all single crochet trim for a simple open-front cardigan.
- Ribbing height: Chain fewer stitches for a narrower, subtler waistband, or more for a wider cropped-sweater look.
- Color blocking: Work the sleeves in a contrasting color for a retro two-tone effect.
FAQ
- What yarn weight works best for that knit-look texture? A smooth worsted or DK weight gives the clearest stitch definition and the most convincing knit appearance. Anything too textured or fluffy will soften the effect.
- How do I adjust the size? The ribbing row count controls the waist circumference — add or remove rows until the ribbing wraps your waist. The body row count controls the length. The number of sleeve shaping repeats controls sleeve width. All the key measurements are built into these counts.
- Can I make the sleeves shorter or cropped? Absolutely. Work fewer shaping repeats and straight rows, or skip the shaping entirely for a simple straight sleeve. Finish with the same cuff ribbing regardless of length.
- My panels don’t match at the shoulder — what went wrong? The most common cause is an uneven stitch count when splitting the panels. If the front and back panel row counts match (which they should — 17 for the back, 12 shaped plus 5 straight for each front), the shoulders should align. Blocking the finished cardigan usually smooths out minor differences.
- Do I have to seam the sleeves in using a blanket stitch? Not at all. A single crochet join works well and is often easier for crocheters to execute evenly. Either method gives a secure, wearable seam — use whichever you’re most comfortable with.