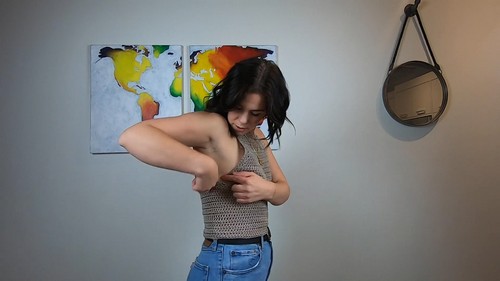
This crochet racerback top is a great choice when you want a handmade piece that feels secure through the shoulders but still looks light and wearable. The racerback shape naturally pulls the straps inward, which helps the top stay in place during movement and creates a clean, flattering line across the back. This Crochet Racerback Top is designed to sit comfortably without digging in, making it easy to wear on its own in warm weather or layered under a cardigan, jacket, or shirt when you want a fitted handmade base layer.
Crochet Racerback Top
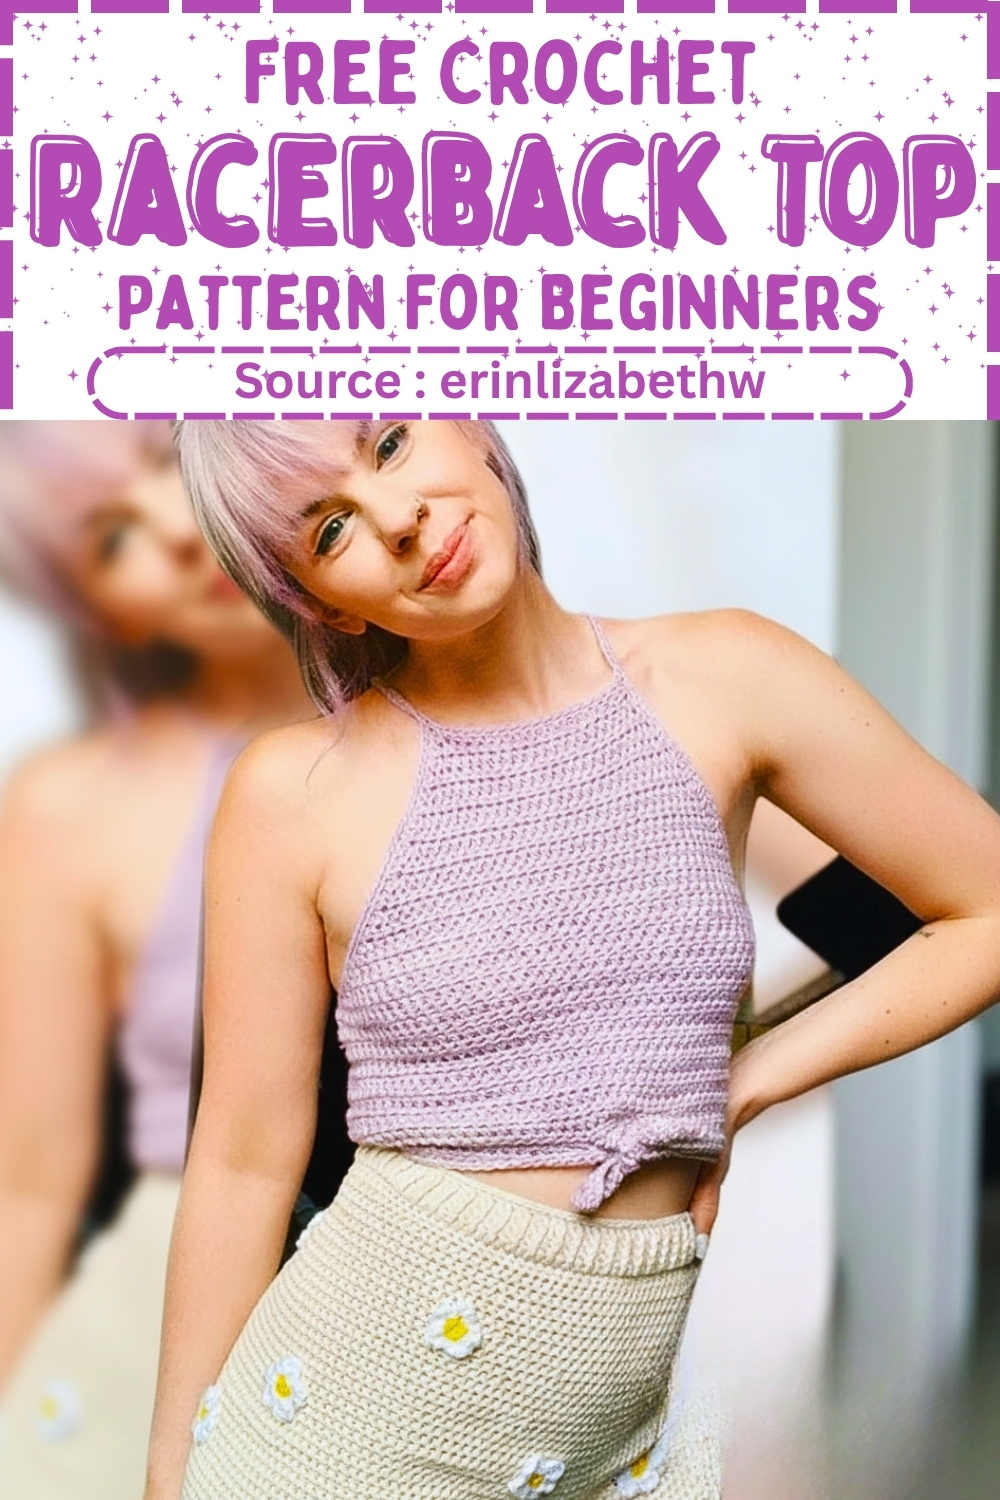
Racerback tops often confuse crocheters because the shaping happens gradually and then suddenly connects into a round. This design is built in clear stages: a flat foundation worked in rows, controlled increases to form the racerback curve, a careful join that connects front and back, and then simple rounds to add length. Understanding what each section is shaping makes the pattern feel predictable instead of intimidating.
What This Pattern Creates
This top uses half double crochet as the main stitch, which gives steady coverage without feeling stiff. The racerback shaping comes from balanced increases at both edges, not from complex stitch changes. Once the panels are joined, the body is worked in the round, creating a smooth, continuous fabric that drapes naturally.
Materials
- Medium weight yarn
- 6.5 mm crochet hook
- Scissors
- Yarn needle
- Stitch markers
Preparation and Foundation
Why this matters: The foundation row sets the width of the entire top. Because the stitch count is based on your size, this is where fit begins. Counting the last two chains as the first half double crochet creates a consistent edge and avoids gaps at the start of the row.
- Chain the required number of stitches based on your size
- Count the last two chains as the first half double crochet
- Work half double crochet into the third chain from the hook
- Continue half double crochet across the entire foundation chain
Helpful notes:
- Keep your foundation chain relaxed. A tight chain can restrict the neckline and shoulders later.
- If you tend to crochet tightly, consider chaining with a hook one size larger, then switch back to the 6.5 mm hook for the first row.
Shaping Increases
What the increases do: These increases slowly widen the fabric at both edges. This is what creates the racerback slope instead of a straight tank-top edge. Because both sides increase evenly, the shaping stays centered and balanced.
- Chain two and turn at the end of each row
- Work two half double crochets into the first stitch
- Work one half double crochet into each stitch across
- Work two half double crochets into the last stitch
- Repeat increase rows as needed to shape the racerback
Stitch clarity:
- The chain two is a turning chain, not an extra stitch to count later.
- Always place the first increase directly into the very first stitch, not into the turning chain.
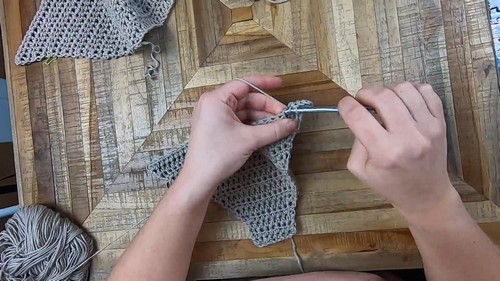
Joining Front and Back
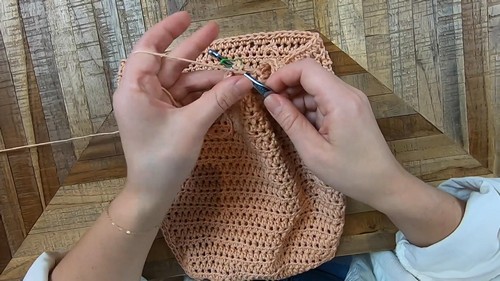
Why this join works: The front and back are shaped slightly differently so the racerback sits correctly between the shoulder blades. The chain spaces help bridge the panels without pulling or puckering, and the slip stitch join turns flat pieces into a continuous round.
- Complete the front and back panels separately
- On the back panel, work an increase at the beginning and end of the row
- Chain three at the end of the back panel row
- Attach to the front panel by working two half double crochets into the last stitch
- Work half double crochet across the front panel
- Increase in the last stitch and chain three
- Slip stitch to join the panels into a round
Common confusion:
- The chain three here creates spacing, not height. Keep it loose so the underarm area stays comfortable.
- Use stitch markers at the join points if it helps you see where each panel begins and ends.
Adding Length
How length is controlled: Once the top is joined, you are no longer shaping width. From this point on, every round simply adds vertical length. Turning after each join helps maintain an even texture and prevents twisting.
- Work half double crochet stitches in the round
- Slip stitch to join each round
- Turn your work after each join to maintain the ribbed texture
- Continue until the desired length is reached
Fit guidance:
- Try the top on after a few rounds to check length.
- Stop early for a cropped fit or continue lower for more coverage.
Straps and Edging
Why back loop only is used: Working in the back loop only adds subtle stretch and creates a cleaner edge that sits flatter against the body, especially around the neckline and armholes.
- Single crochet evenly around the armholes and neckline
- Work the next round in back loop only
- Chain the desired number of stitches at the front corner for the strap
- Attach the strap to the back corner with single crochet
- Join yarn at the back neckline
- Single crochet in back loop only around the neckline and over the strap chains
Strap tips:
- Chain fewer stitches for a supportive strap or more stitches for a relaxed fit.
- Try the top on before securing both straps to confirm placement.
Bottom Finishing Options
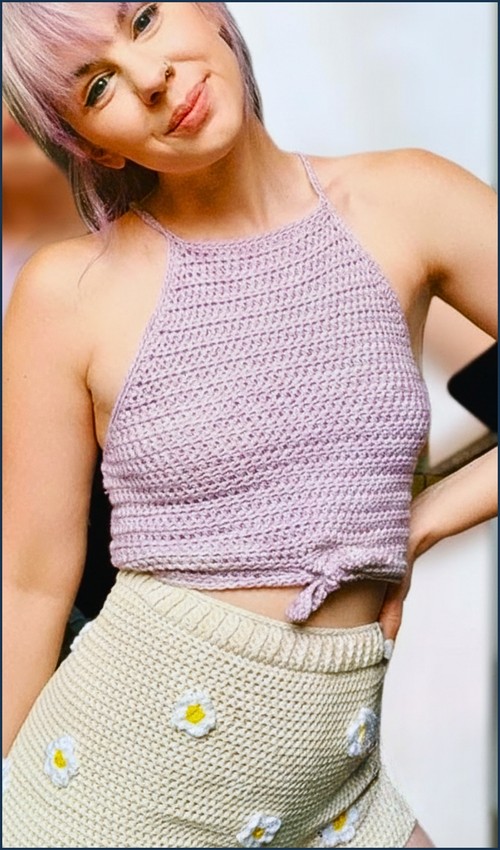
What these options offer: The bottom edge can be clean and classic or adjustable with ties. Using a smaller hook creates a firm edge that helps the top keep its shape over time.
- Single crochet evenly around the bottom edge for a classic hem
- Use a smaller hook size for a tighter and cleaner finish
- Mark a small gap at the center front for a tie option
- Chain for the first tie
- Single crochet around the bottom edge to the other side of the gap
- Chain again for the second tie
- Single crochet back along the chains and across the gap to secure the ties
Fit and Sizing Guidance
- Width is determined entirely by your foundation chain and increase rows.
- Length is adjustable and can be customized at any point after joining.
- The racerback shape naturally narrows the back, so if you are between sizes, sizing up in width often feels more comfortable.
Beginner Notes
- Count stitches regularly during increase rows to avoid uneven shaping.
- Place markers at the start and end of rows during shaping to stay oriented.
- Turn your work consistently after joining rounds to keep the texture even.
Troubleshooting
- Neckline feels tight: Your foundation chain may be too tight. Consider starting over with a looser chain.
- Fabric flares too much: Reduce the number of increase rows.
- Straps twist: Make sure chains are not twisted before attaching.
Finishing Notes
- Weave in ends along stitch paths to keep them invisible.
- Light blocking can help even out the half double crochet fabric.
- Let the top rest flat before wearing to allow the stitches to settle naturally.