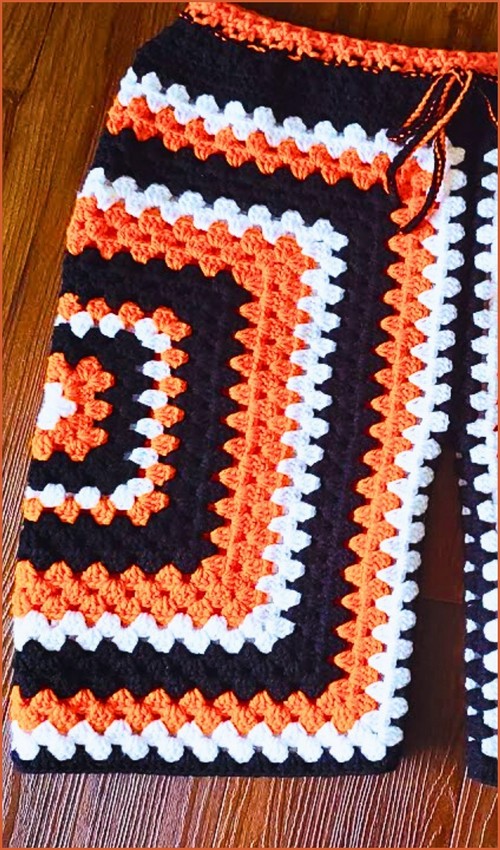
Crochet Beach Wear Skirt

This skirt is built in two clear stages: first, a fitted ring of granny squares that sets the width and placement on the body, and second, a simple mesh-and-solid body worked downward in continuous rounds. By separating structure from length, the design stays easy to adjust while still feeling stable and intentional as you crochet.
Materials
- Cotton yarn suitable for garments
- Crochet hook that matches your yarn
- Scissors
- Yarn needle
Pattern Overview
- This skirt begins with classic granny squares joined into a ring that fits around the hips or upper thighs.
- Once the base ring is complete, the body of the skirt is crocheted directly onto the top edge, eliminating extra seams.
- A simple drawstring waistband finishes the piece and allows flexible sizing.
- Because the fit depends on square count and spacing rather than stitch counts alone, this pattern is naturally customizable.
The Granny Square Pattern
Make enough squares to fit around your hips or upper thighs. The example uses 12 squares.
- Start with a magic circle
- Chain 2 to count as the first double crochet
- Work 2 double crochets into the circle
- Chain 2 and work 3 double crochets
- Repeat the chain 2 and 3 double crochet sequence until you have four clusters
- Pull the ring tight, chain 2, and slip stitch to the top of the starting chain
- Chain 3 to begin the next round
- In each corner space work 3 double crochets, chain 2, and 3 double crochets
- Chain 1 between corner clusters along the sides
- Continue the granny pattern by placing 3 double crochets in side spaces and corners as 3 double crochets, chain 2, and 3 double crochets
Finish with a slip stitch and fasten off once the square reaches your desired size

Granny Square Clarity Notes
- The first round creates four corners right away, which makes these squares naturally square even at a small size.
- The chain 2 spaces define the corners and are important for keeping the square flat.
- If your square starts to curl, it usually means the corner chains are too tight or missing.
- Keep all squares the same size. Even small differences will affect how evenly the skirt hangs once joined.

Assembly
- Place two granny squares with right sides facing each other
- Join one edge using single crochet through both layers
- Repeat until all squares are connected in one long strip
- Join the first and last squares to form a ring that fits comfortably around your legs
Assembly Guidance
- Before joining the final seam, try the strip around your hips or thighs.
- The ring should sit comfortably without stretching.
- If it feels tight, add another square. If it feels loose, remove one square before closing the ring.
- Using single crochet joins adds structure and prevents the base from stretching out with wear.

The Skirt Body
- Attach yarn to the top edge of the granny square ring
- Work one full round of single crochet evenly around
- Chain 3 to begin the transition mesh row
- Skip two stitches and work one double crochet in the next stitch
- Chain 1, skip two stitches, and work one double crochet
- Repeat the mesh pattern around the ring
- Adjust spacing by skipping only one stitch if more width is needed
- Chain 2 and work one double crochet into every stitch and chain space
- Continue working double crochet rounds without turning
- Crochet until the skirt reaches your desired length
Stitch and Shaping Explanation
- The single crochet round stabilizes the top of the granny squares and creates an even foundation for the body.
- The mesh row introduces drape and movement, preventing the skirt from feeling stiff at the hips.
- Switching to solid double crochet rounds after the mesh helps the skirt fall straight and gives enough weight for a clean silhouette.
- Working in continuous rounds avoids visible seams and keeps the texture consistent.

Waistband and Cord
- Work six double crochets, chain 1, and skip one stitch
- Repeat the eyelet pattern evenly around the waistband
- Create a long chain that fits around your waist with extra length
- Single crochet back along the chain to thicken the cord
- Weave the cord through the eyelet spaces
- Tie the cord at the front and secure all yarn ends
Waistband Notes
- The eyelet pattern functions as a built-in casing, removing the need for elastic.
- The reinforced cord gives enough strength to support the skirt without cutting into the waist.
Fit and Sizing Guidance
- This skirt is sized primarily by the number of granny squares. Measure around the widest part of your hips or upper thighs and compare that to your joined square strip before closing the ring.
- Length is controlled entirely by how many rounds you work in the body section, making it easy to adjust for mini, knee-length, or longer styles.
Beginner Notes
- If you are new to garment construction, focus on keeping your tension consistent, especially when joining squares. Lay your work flat often to check for twisting or uneven joins.
- Using cotton yarn helps the skirt hold its shape while remaining breathable for warm weather.
Troubleshooting
- If the skirt flares too much, reduce the spacing in the mesh row or work fewer double crochet rounds.
- If the skirt feels tight at the hips, undo the final join and add another granny square.
- If the waistband gaps, pull the cord tighter and redistribute the gathers evenly before tying.
Finishing Notes
- Weave in all ends securely, especially at join points and the waistband. Block lightly if needed to smooth the granny squares and even out the body fabric.
- This skirt is designed to move naturally with the body, so a relaxed finish will look better than an overly stiff one.