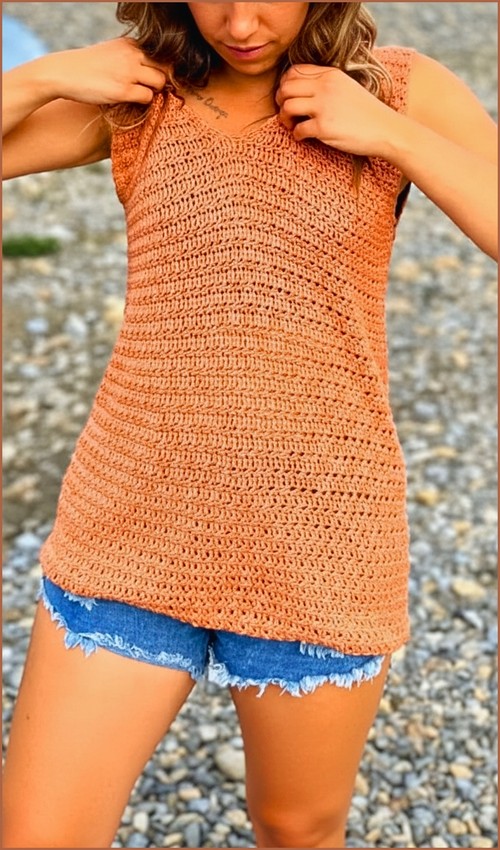
The back of a crochet twist top is what gives the garment its structure and visual balance, and this design is built with that in mind. The Crochet Twist Top Back is formed through controlled panel shaping, strategic decreases, and a final crossed assembly that creates the twist without adding bulk. Instead of relying on complex stitches, the construction uses simple rows worked in a specific order so the fabric naturally angles inward where needed. Understanding how each section builds on the previous one makes the shaping feel intentional rather than confusing, especially when working the open back and twist placement.
Crochet Twist Top Back
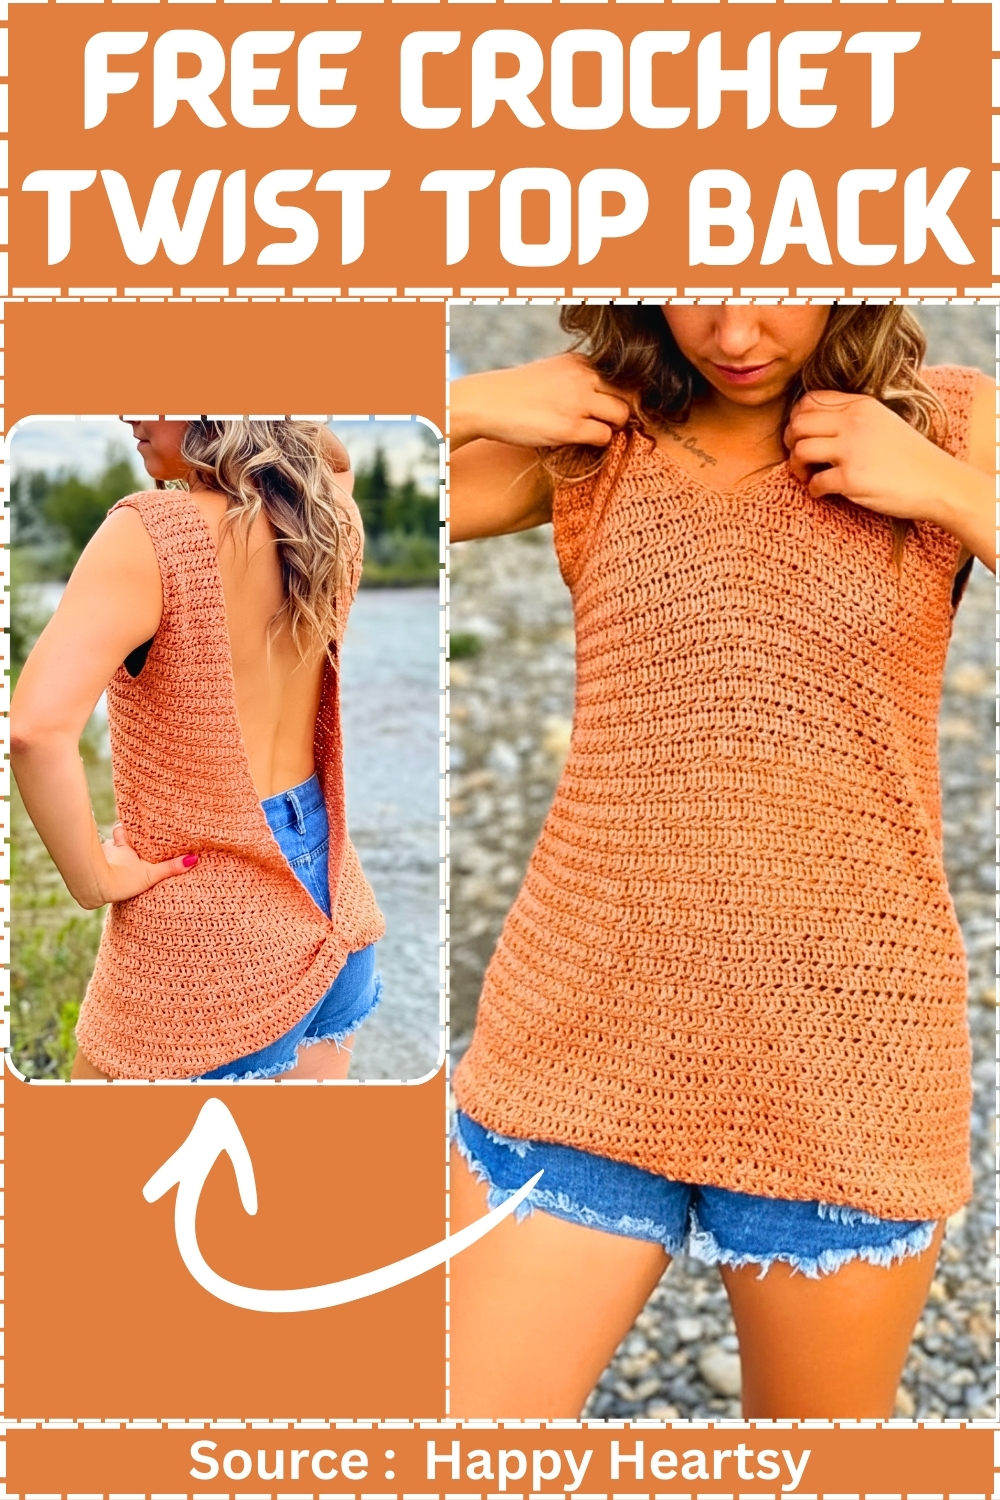
If you have ever tried to make an open-back crochet top and ended up with uneven edges, a back opening that sits off-center, or decreases that don’t match on both sides, this pattern is built to help you avoid that. The shaping works because you only decrease on specific rows, and you use stitch markers to keep the V opening clean and intentional. If you go slowly through the first few repeats and check your stitch counts, the rest of the top becomes very predictable.
Materials
- Light weight yarn size 3 suitable for summer wear
- 4 mm crochet hook
- Stitch markers
- Scissors
- Yarn needle
Stitch and pattern clarity
What the “floral stitch” rows really are
- Your floral stitch rows are an alternating texture row made by switching between double crochet and slip stitch.
- The slip stitches pull the fabric down slightly and create little dips between the taller double crochet stitches.
- That contrast is what makes the texture show.
- Because slip stitches are short and tighter than double crochet, it’s normal for these rows to feel slower and more “grabby” on the hook.
- That’s also why you include a full double crochet row after each floral row: it resets the height and keeps the fabric flexible.
Why stitch markers matter here
You use stitch markers for two jobs:
- Shaping control (especially the back V and the armhole side).
- Symmetry (making sure the left and right sides of the top match).
Any time you start decreasing, place markers at:
- the first stitch you will work into
- the last stitch you will work into
- This keeps you from drifting inward more than intended.
Fit and sizing guidance
Choosing your starting chain
You are told to “chain an even number of stitches according to your size.” The most reliable way to do this is:
- Measure the width you need for the panel you are making (for example, across the back where you want the top to sit).
- Crochet a short test strip in double crochet to see how many stitches you get per inch or centimeter.
- Convert that measurement into a stitch count, then round to an even number.
What to watch for with summer yarn
- Light weight size 3 yarn can grow slightly as you wear it, especially in a looser stitch like double crochet.
- If you are between sizes, it usually looks better to start slightly narrower and let it relax with wear.
Beginner notes that prevent mistakes
- Count real stitches, not turning chains. This pattern asks you to treat turning chains as stitches in specific places. The easiest way to stay consistent is to mark the “turning chain stitch” at the edge so you always know where the last stitch of the row is.
- Slip stitches can hide. When you come back on the next row, the slip stitch from the floral row can look like a tight knot. That’s why your pattern includes “Insert carefully into slip stitches from the previous row.”
- Decreases should look the same on both ends. When you decrease at the beginning and end of a row, keep your decrease method consistent so both edges lean the same way.
Pattern
Foundation And First Row
- Chain an even number of stitches according to your size
- Make double crochet into the third chain from the hook
- Work double crochet into each chain across
- Skip the first two chains which count as one stitch
- End with an odd number of double crochet stitches
Extra clarity for this section (without changing your steps):
- “Double crochet into the third chain from the hook” means the first two chains are left unworked because they create the height for the first stitch.
- Ending with an odd number of double crochet stitches is important because the next row alternates stitches. An odd stitch count helps the alternating sequence land correctly at the end.
Floral Stitch Pattern Setup
- Chain one and turn
- Treat the chain one as a stitch
- Make double crochet into the second stitch
- Make slip stitch into the next stitch
- Alternate double crochet and slip stitch across the row
- Always start and end this row with a slip stitch
How to keep this row neat:
- Because you are told to “treat the chain one as a stitch,” your first “real” stitch placement begins after that turning chain.
- This row will naturally tighten the fabric. That is normal. Try not to pull the slip stitches too hard or the edge may draw in.
Solid Double Crochet Row
- Chain two and turn
- Treat the chain two as a stitch
- Make double crochet into every stitch across
- Insert carefully into slip stitches from the previous row
Why the careful insertion matters: Slip stitches sit low and can twist slightly. Aim your hook under the top loops the same way you do for the double crochet stitches. If you accidentally skip a slip stitch, your stitch count will drop and the shaping later will not line up.
Pattern Repeat
- Repeat the alternating floral stitch row and solid double crochet row
- All even rows use the floral stitch pattern
- All odd rows use only double crochet stitches
Practical tracking tip: Decide now whether you are counting your foundation row as Row 1. Then stick to that choice the whole time. Many crocheters place a marker or write it down so “even row” and “odd row” doesn’t get confusing halfway through.
Side Decreasing For Open Back
- Decrease only on double crochet rows
- At the beginning of the row, work two double crochets together
- Continue double crochet across
- At the last three stitches, work another decrease
- Maintain stitch count accuracy with stitch markers
What “last three stitches” usually means in practice: You will crochet until you have three stitches left, then work your decrease, then work the final stitch. Keep using stitch markers at the edges so you can confirm you still have the correct number of stitches after each decrease row.
Back Panel Shaping
- Continue decreasing on one side only to form the open back V shape
- Stop decreasing when armhole depth is reached
- Work straight rows without decreasing to finish the back panels
Why decreasing on one side creates a V: If only one edge moves inward while the other edge stays straight, you create a diagonal line. When this is mirrored on the other back panel, the two diagonals form the open V shape.
Sleeve And Shoulder Panels
- Attach yarn at stitch markers
- Work double crochet rows while decreasing only on the armhole side
- Alternate with floral stitch rows without decreasing
- Repeat until both sides match in size
Matching both sides: This is where measurement matters more than row count. One side can be one row off and still “match” if the height is the same. Lay both panels flat and compare regularly.
Front Panel Construction
- Attach yarn at center front
- Decrease on both sides during double crochet rows
- Alternate with floral stitch rows
- Split the front into left and right panels
- Shape each side with controlled decreases until matching sleeve height
Keeping center front clean: When you attach at the center, place a stitch marker at that center point. That gives you a reference so your left and right decreases stay balanced.
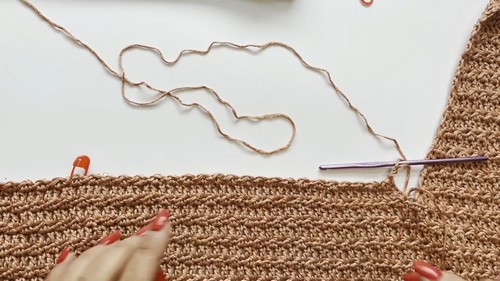
Assembling The Top
- Place right sides together
- Sew shoulder seams evenly using yarn needle
- Weave in all loose ends securely
Finishing thought for assembly: Before sewing, pin or clip the shoulders so they cannot shift. Even small shifts can make the neckline sit unevenly.
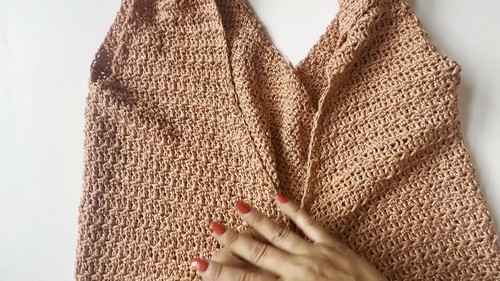
Twisted Back Assembly
- Lay the top with wrong side facing up
- Fold the lower back sections inward toward the stitch markers
- Cross the panels to create a twist
- Align edges evenly
- Sew through all layers securely
- Turn the top right side out to reveal the twisted back
How to place the twist so it looks intentional: Before sewing, take a moment to check that both folded sections are the same depth. If one side folds farther than the other, the twist will sit off-center.
Finishing
- Weave in remaining yarn ends
- Adjust twist placement if needed
- Optional small stitch can be added for extra back coverage
Troubleshooting
My edges look wavy or uneven
- This usually comes from inconsistent turning chains being counted differently from row to row.
- Since your pattern asks to treat turning chains as stitches, place a marker in the turning chain at the start of each row so you always work into it the same way.
My stitch count keeps shrinking too fast
Common causes:
- missing the slip stitches on the solid double crochet row
- accidentally decreasing on a floral stitch row
- skipping the turning chain stitch when it is meant to count
Go back to the last correct row and recount from edge to edge.
The floral stitch row is too tight
- Slip stitches tighten fabric. Try loosening your tension slightly on slip stitches only.
- You do not need to change hook size unless the fabric is pulling in dramatically.
The back V opening is not centered
- This happens when the decreases on one panel are not mirrored correctly on the other.
- Use stitch markers and measure the diagonal line from the top corner down to the point where you stop decreasing.
- Make the second panel match that measurement.
Finishing notes for a clean, durable top
- Weave in ends along the thickest parts of the fabric (double crochet rows hold ends better than slip-stitch sections).
- On the twist seam, weave ends in opposite directions so that area stays strong.
- After finishing, lay the top flat and gently shape it with your hands so the twist sits where you want it before wearing.