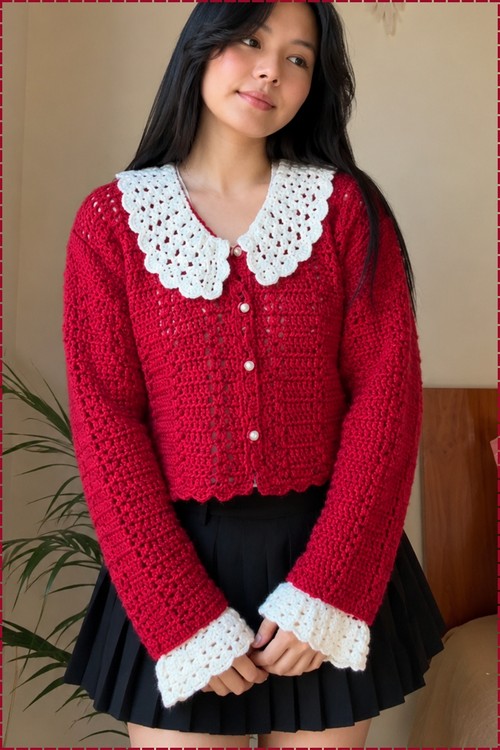
Every collar row adds a V-stitch at each outer edge, so the white trim spreads into a rounded Peter Pan shape over just a few rows. Underneath, a heart stitch body, V-neck decreases and gathered ruffle cuffs make this crochet cardigan with collar an intermediate project.
Red yarn and a white peter pan collar make this crochet collar sweater one of those projects that photographs beautifully and wears even better. The contrast trim at the collar and cuffs does most of the design work, so the body itself stays straightforward enough for anyone comfortable with a basic crochet cardigan.
Crochet Collar Sweater
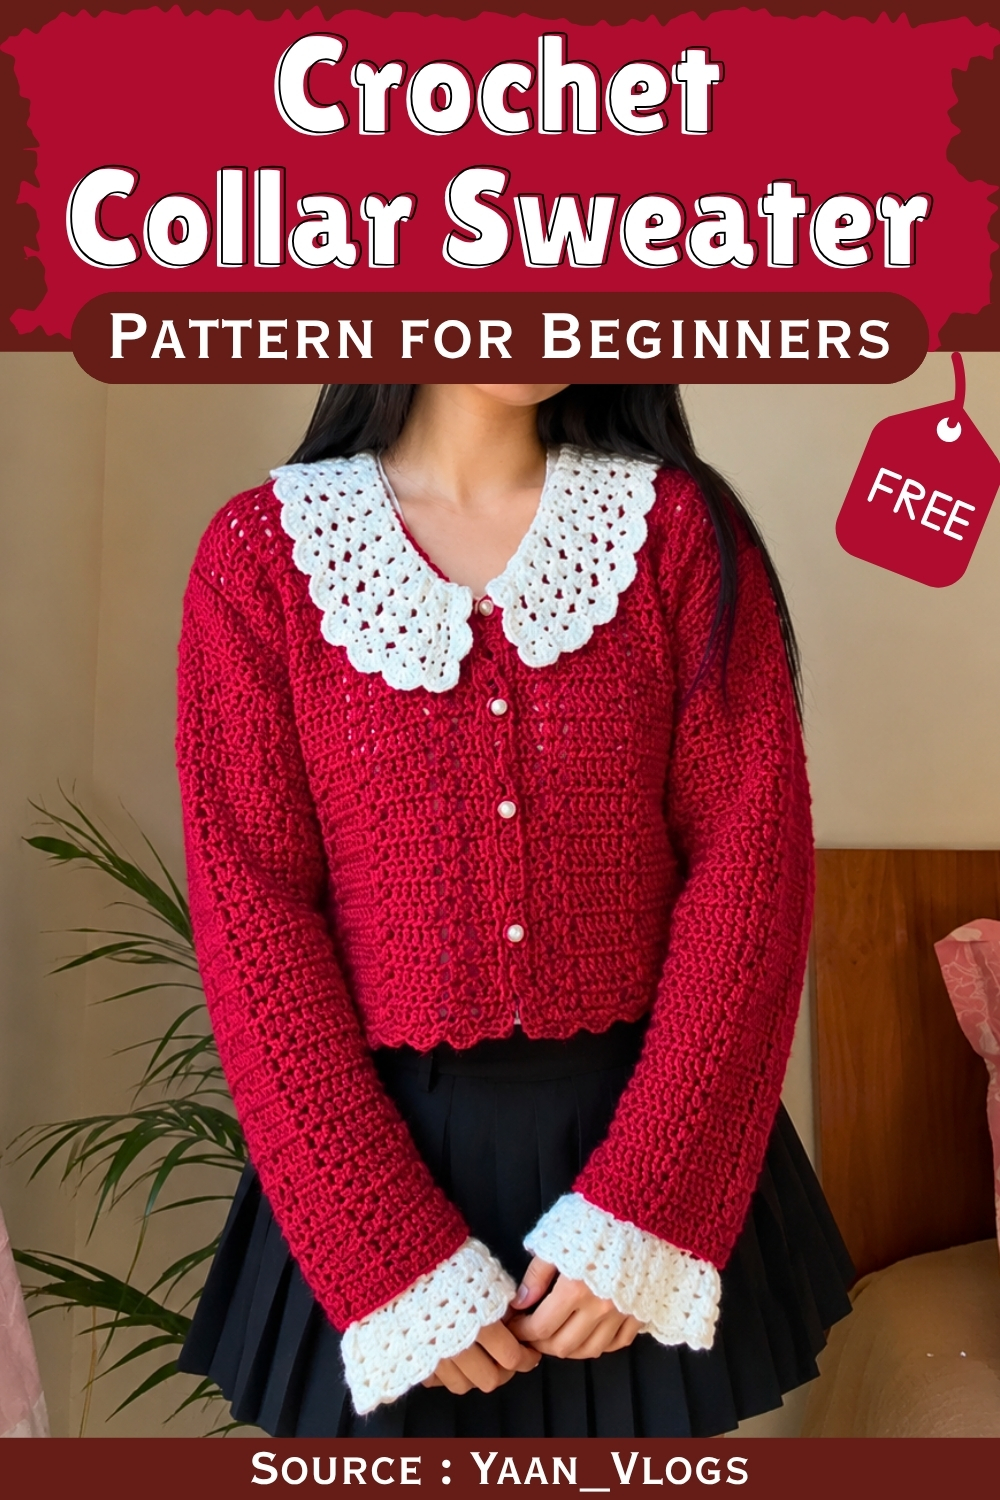
Pearl buttons run down the center front and the hem closes with a matching scalloped edge that ties the whole piece together. Working the collar and cuff trim as separate panels means you can adjust the size of each independently before sewing them on.
Materials and Tools
- Acrylic yarn (its stretch and flow are important for this pattern — the body will relax and drape after the first row)
- A 4.5 mm hook for the main body and sleeves
- A 4.0 mm hook for the collar and cuff details
- A slightly thinner leftover or contrast yarn for the collar and cuffs (the original uses maroon)
- Stitch markers
- Darning needle
- Scissors
- Measuring tape
- Buttons (for the front bands)
Basic Stitch to Know
Difficulty and Time
This is an intermediate project, sitting above the usual beginner range because it involves a special “heart stitch” that works mid-row, V-neck decreasing, ruffle cuff shaping, and a separately-built collar. None of these are impossible — but each requires attention and patience. Budget several focused sessions and take each section at its own pace. The reward is a genuinely beautiful finished piece.
Beginner Technique Notes
Here’s a detailed walkthrough of every technique in this pattern:
The heart stitch
- The heart stitch is the recurring special stitch in this cardigan and appears in a specific position within every two-stitch-block set. Here’s how to make it: chain 1, skip 1 chain (or stitch). In the next chain, yarn over and pull through, then repeat once more in the same loop. Pull through all loops together, chain 1, then make another identical half of the stitch in the same loop, and chain 1. It sounds complex in words but becomes legible after a few repetitions — it’s essentially two partial stitches worked into the same spot with chains between them to form the heart shape. Tip: mark the position of your first heart stitch on Row 1 and count that it always falls in the same stitch slot on every subsequent row.
The 5-double-crochet block
- The pattern alternates groups of 5 regular double crochets with the heart stitch. Each group of 5 sits directly above the previous row’s group of 5, and the heart stitch always sits above the previous row’s heart stitch. Once you’ve worked a complete Row 2, the vertical columns become visually clear and easy to track.
Acrylic stretch allowance
- Acrylic yarn stretches significantly after the first row. The pattern deliberately chains fewer stitches than your flat measurement to account for this. For a medium-to-large size (targeting 18 inches of panel width), the original uses 66 chains. Tip: work the first complete row, then measure the actual width before continuing — adjust your count if needed rather than discovering the fit issue 10 rows later.
V-neck decreasing
- The front panels work in straight pattern rows until Row 24, then begin angling the neckline edge. The decrease works by partially completing a double crochet near the edge and combining the loops together to make the edge slope sharply inward while the outer (armhole) edge stays straight. This is worked consistently on one side only on each front panel, mirrored between left and right.
Ruffle cuff construction
- At the sleeve opening, you switch to a smaller hook and thinner contrast yarn, decrease a few stitches in the first row to gather the fabric slightly, then work 3 rows of a V-stitch mesh pattern before adding a finishing scallop border. The gather and the V-stitch together create the ruffled cuff look.
V-stitch (for the collar)
- A V-stitch is simply: double crochet, chain 1, double crochet, all worked into the same stitch or space. It’s the building block of the entire collar. Tip: on your first collar row, count your V-stitches and make sure the total is even — this makes the increase rows easier to track.
Peter Pan collar increases
- The collar grows by adding an extra V-stitch at both outer edges on each new row. After 4 to 5 rows of this, the collar flares out into the rounded, vintage Peter Pan shape. The key is consistency — one extra V-stitch per edge per row, every row.
Scallop border
- The decorative scallop edge runs along the front vertical openings. A scallop is usually worked by alternating a cluster or shell stitch with a single crochet or slip stitch anchor. Tip: try a small sample scallop on a test chain before starting the actual border so you know the repeat length fits your button spacing.
The Pattern
1. Back Panel
Gauge and chain count
For a comfortable medium-to-large (targeting approximately 18 inches of panel width), chain 66 stitches. Remember that acrylic stretches after the first row, so this number accounts for that.
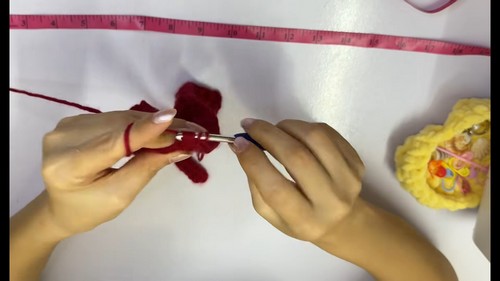
Row 1
- Skip the first 2 chains (these count as your first double crochet).
- Work 5 double crochets across the next 5 chains.
- Chain 1, skip 1 chain.
- Heart stitch: In the next chain, yarn over and pull through, then repeat once more in the same loop. Pull through all loops together, chain 1, make another identical half of the stitch in the same loop, then chain 1.
- Skip 1 chain, work 5 double crochets in the next 5 chains.
- Repeat this sequence — 5 double crochets, chain 1, skip 1, heart stitch, chain 1, skip 1 — across the row, ending with a double crochet in the last chain.
Subsequent rows
- Chain 3 and turn.
- Work a heart stitch directly in the space between the previous row’s heart stitches.
- Chain 1, skip the chain space, and work regular double crochets on top of every double crochet from the previous row.
- Repeat this 2-row pattern until the back panel reaches approximately 18 inches in length.
2. Front Panels (Left and Right)
- For each front panel, chain 35 stitches, leaving a 1 to 1.5 inch gap in the center between the two panels for the button and scallop bands.
- Follow the exact same 5-double-crochet and heart-stitch pattern used for the back panel.
- V-neck shaping: Work straight pattern rows up to Row 24. Starting on Row 25, begin decreasing on the neckline edge to create the slanting V-shape. Decrease by working a partial double crochet near the edge, combining loops together so the neckline edge angles sharply inward toward the shoulder while the outer armhole edge stays straight. Continue this decrease on each neckline-edge row through to Row 37.
3. Sleeves
- Work the main sleeve panels to slightly shorter than your target length — if you want a 21-inch sleeve, work the main body to approximately 18.5 to 19 inches — leaving room for the cuff details.
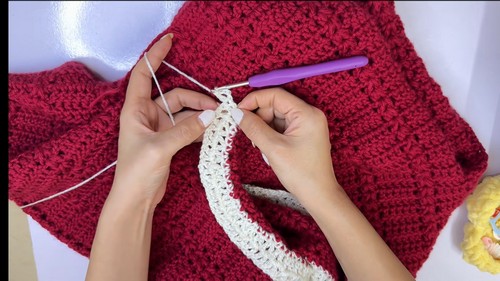
- Cuff: Switch to the 4.0 mm hook and thinner contrast yarn. Work 1 row with a few decreases to gather the fabric slightly. Work 3 rows of V-stitch mesh pattern. Add a finishing scallop border. Fasten off.
If you’re new to reading crochet patterns, don’t worry, just follow along with the video tutorial below and use the written pattern as a reference!
4. Collar Construction
- Join all major pieces (front and back panels, sleeves).
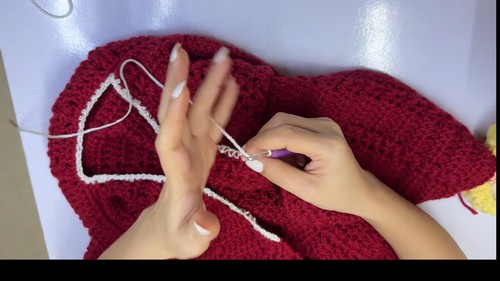
- Using the 4.0 mm hook and thinner yarn, start two rows below the V-neck decrease point. Work a foundational round of single crochets all the way around the neckline.
- V-stitch collar pattern: Chain 2 (counts as a double crochet), chain 1, and make another double crochet in the same chain space to form the first V-stitch. Skip 1 chain, then work a V-stitch (double crochet, chain 1, double crochet) in the next chain. Repeat around.
- Collar shaping and increases: On subsequent rows, increase by adding an extra V-stitch at both outer edges of the collar on each pass. Continue for 4 to 5 rows (or until the collar reaches your preferred width) to form the vintage Peter Pan collar shape.
5. Finishing Edges and Assembly
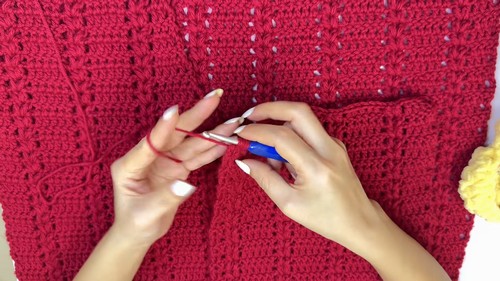
- Scallop edging: Add a decorative scallop edge along the front vertical openings where buttons and buttonholes will be placed.
- Sew on your buttons to complete the cardigan.
Tips and Troubleshooting
- Work the heart stitch slowly the first time. It involves two partial stitches and three chains in quick succession — writing out the steps and talking yourself through it on your first repeat will help you feel the rhythm before you need to work it quickly.
- Measure after Row 1, not before. Acrylic’s stretch means your chain width is deliberately smaller than your target. After Row 1 is complete, measure the actual width and compare it to your target — this is your last easy opportunity to add or remove chains.
- Mark the neckline decrease start on both front panels before you begin. Both left and right front panels need to start their V-neck decrease on the same row (Row 25). Mark it at the start and you won’t need to count back later.
- Keep collar increases consistent. One extra V-stitch per outer edge per row — no more, no fewer — is what creates the classic Peter Pan collar shape. Inconsistent increases will make the collar ripple or cup instead of lying flat.
- Sample your scallop border before placing it on the cardigan. The scallop repeat needs to fit evenly across the front band, which is where your buttons will sit. Testing the repeat on a short foundation chain first lets you confirm the spacing before committing to the actual band.
Customization Ideas
- Adjust the collar size. Working more than 4 to 5 increase rows gives a larger, more dramatic Peter Pan collar; stopping earlier gives a shorter, more subtle collar.
- Change the contrast color. The original uses maroon for the collar and cuffs — any color that echoes or contrasts the main body color works for this detail.
- Skip the ruffle cuff. For a simpler sleeve, finish the cuff with a single round of single crochets or a plain double crochet border rather than the ruffle detail.
- Change the buttons. The vintage character of this cardigan is significantly affected by button choice — vintage-style shell or pearl buttons lean into the retro feel; modern toggles or wooden buttons change the mood completely.
Frequently Asked Questions
1. Is this pattern really approachable for a confident beginner? With patience, yes — but it’s more accurately an intermediate project. The stitches are manageable one by one, but the combination of the heart stitch, V-neck shaping, ruffle cuffs, and collar means there are more technique transitions than a true beginner pattern. Going section by section and allowing yourself time on each stage is the key.
2. What is the heart stitch and why is it called that? The heart stitch is a custom combination of partial stitches worked into the same loop with chains between them, creating a raised, split-point shape that resembles a small heart when worked and viewed on the right side. It’s the design signature of this cardigan’s fabric.
3. Why does the pattern use two different hook sizes? The 4.5 mm hook makes the main acrylic body with enough drape and ease for a cardigan. The 4.0 mm hook is used for the collar and cuff details where a tighter, slightly denser stitch is needed — the collar needs to hold its shape, and the cuff needs to gather properly without being too floppy.
4. How do I know if my chain count is right for my size? After Row 1, measure your actual panel width. If it’s close to 18 inches, you’re on track. If it’s significantly wider or narrower, unravel and adjust by adding or removing chain stitches in increments. The original is sized for medium-to-large with 66 chains; adjust proportionally for other sizes.
5. What is a V-stitch and how does it grow the collar? A V-stitch is double crochet, chain 1, double crochet — all in the same stitch or space. The chain-1 in the center is what the next row’s stitches work into. Adding one extra V-stitch at each outer edge of the collar on every row gradually widens the collar from the neck outward, producing the fan-like spread of the Peter Pan shape.