
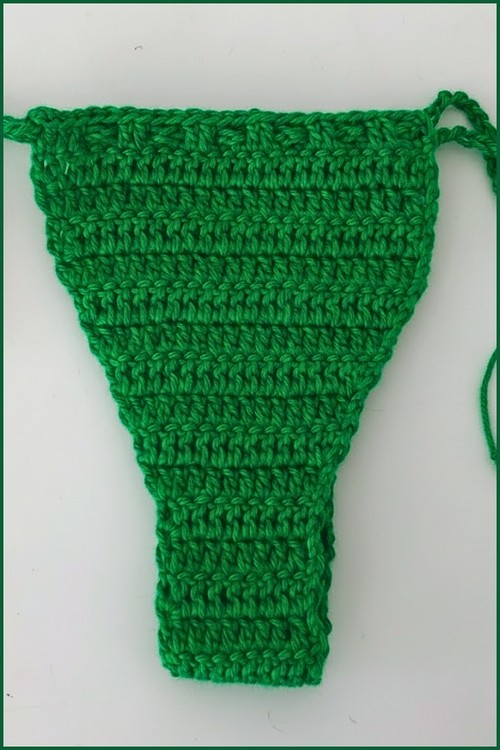
The right swimwear feels secure, comfortable, and shaped to your body. That is not always easy to find, especially when browsing through free designs that leave important details unexplained. A thoughtfully written Crochet Swimsuit Bottoms pattern free guide should do more than list rows. It should help you understand coverage, shaping, and fit so you can crochet with confidence and end up with a piece that feels made for you.
Crochet Swimsuit Bottoms
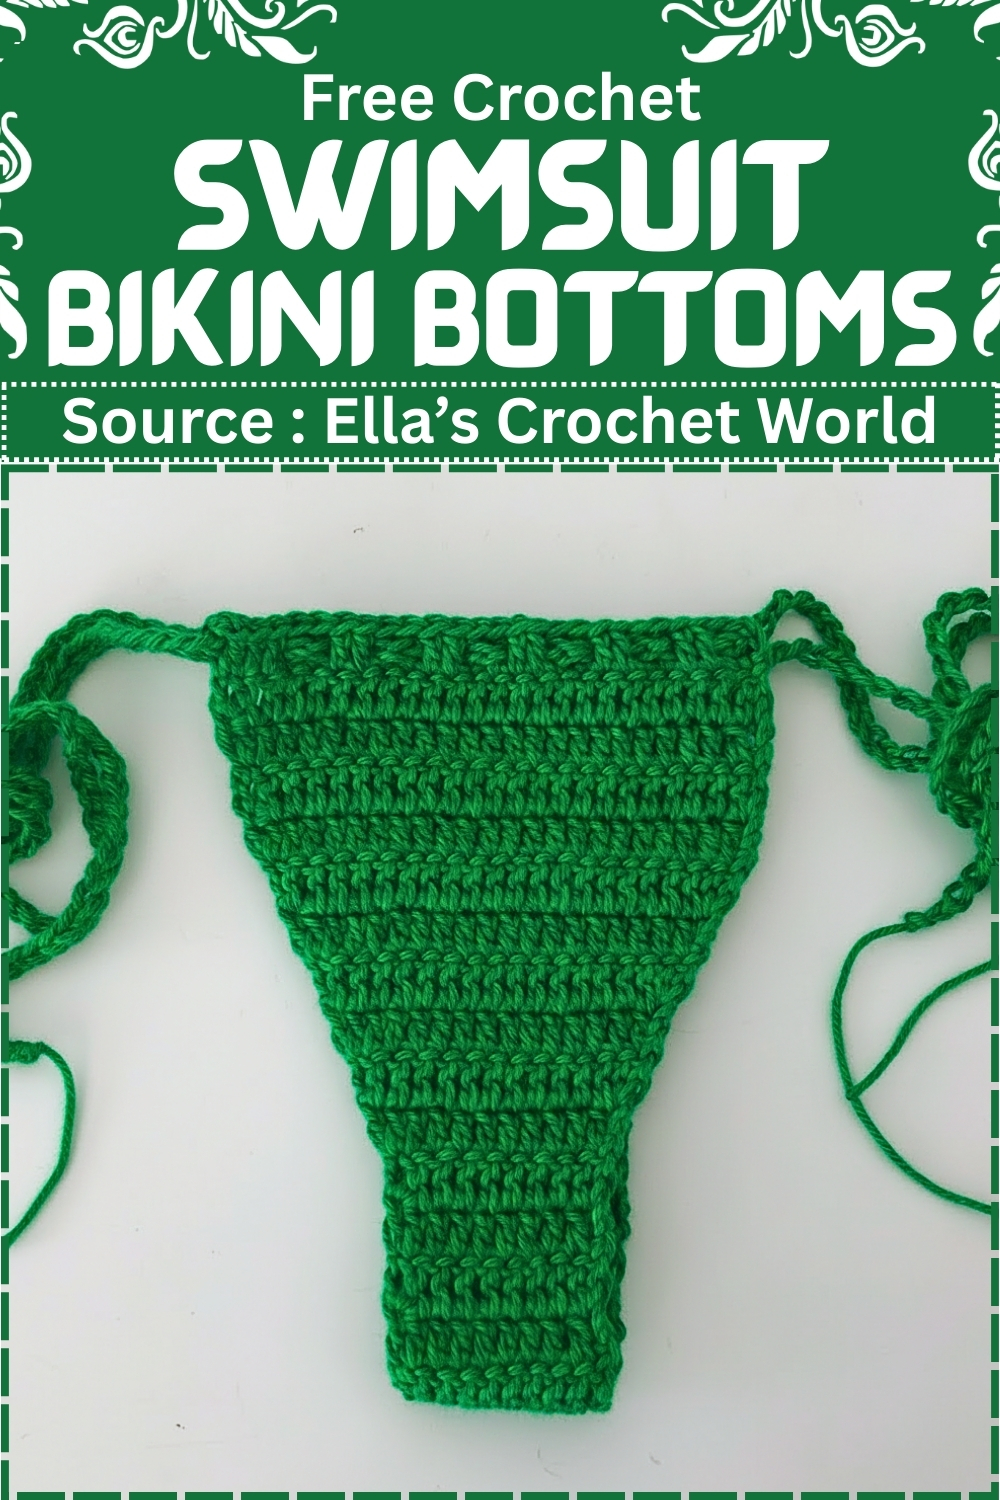
Getting clean shaping on a crochet garment can feel intimidating. Increases at the edges can ripple. Coverage can feel uncertain. And when working something fitted, even a small tension difference shows immediately. This pattern keeps the shaping simple and predictable. The base is worked in straight rows with no increases. Then controlled edge increases create front and back coverage gradually. The ties are added last, so you can fully adjust the fit.
Materials
- 4 ply cotton yarn
- 2.5 mm crochet hook for the body
- 4.0 mm crochet hook for the ties
- Scissors
Foundation Crotch Area
- Make a slip knot
- Chain 9
- Chain 3 more to count as the first double crochet
- Work one double crochet into the ninth chain from the hook
- Work one double crochet into each chain across
- Chain 3 and turn
- Work one double crochet in each stitch across
- Repeat the same row until you have a total of 5 rows with no increases

Foundation Section Clarity
- This first section creates the narrow center panel. Think of it as the anchor that both the front and back will grow from.
- The extra chain 3 acts as your first double crochet. This means the row already begins with height, and you do not place an additional stitch into that turning chain.
- Working five rows with no increases stabilizes the center width. Do not rush this part. If your edges begin to slant inward, check that you are placing the final double crochet into the true last stitch and not missing it.
Cotton yarn does not stretch much. Keeping your tension even here will affect the overall fit later.
Front Panel Shaping
- Chain 3 and turn
- Work two double crochets into the very first stitch
- Work one double crochet in each stitch across
- Work two double crochets into the last stitch
- Repeat this increase row at the beginning and end of every row
- Continue increasing until you complete Row 15 or reach your desired front coverage
How the Front Shaping Works
The shaping happens only at the edges. By placing two double crochets into the first and last stitch of each row, you increase by two stitches per row.
This creates a gentle outward angle rather than an abrupt flare. Because the increases are symmetrical, the panel grows evenly on both sides.
Common point of confusion:
- The chain 3 still counts as your first double crochet.
- The two double crochets mentioned in the first stitch are worked into the same stitch space at the edge.
- Be sure you are not accidentally increasing into the turning chain unless your stitch count confirms it is correct.
If your edges start to wave, your increases may be too tight. If the panel cups inward, your tension may be too loose. Cotton shows structure clearly, so adjust early if needed.
Stopping at Row 15 is a guideline.
Coverage varies depending on:
- Yarn thickness
- Personal tension
- Body proportions
Lay the piece flat against yourself as you work. The goal is comfortable front coverage without overstretching.
Back Panel
- Attach yarn to the opposite side of the crotch section
- Chain 3 and work one double crochet in each stitch across
- Repeat this row until you have 5 rows with no increases
- Begin increasing by working two double crochets into the first stitch
- Work one double crochet in each stitch across
- Work two double crochets into the last stitch
- Continue increasing in every row until you reach Row 16 or your preferred back coverage

Back Panel Guidance
- The back is constructed the same way as the front but typically grows slightly longer for additional coverage.
- Attaching yarn to the opposite side ensures the shaping expands in the correct direction. When you begin, make sure your yarn is secured firmly before working the first chain 3.
- Again, five straight rows create stability before increasing begins. This keeps the center section balanced.
The increase method is identical to the front:
- Two double crochets in the first stitch
- Two double crochets in the last stitch
Consistency matters here. Count your stitches at the end of each row if you are unsure. Edge increases are easy to miss if you skip the final stitch.
Stop at Row 16 or adjust based on preference. Coverage is personal. Always measure as you go.
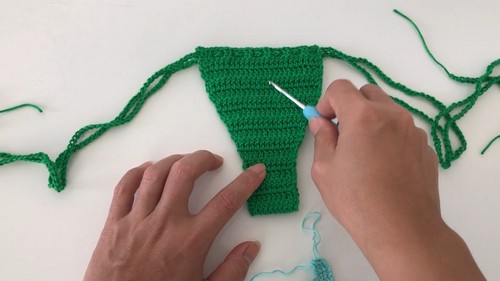
Ties And Finishing
- Switch to a 4.0 mm crochet hook
- Attach yarn at the top edge of the front panel
- Chain until the tie reaches your desired waist length
- Fasten off
- Repeat for the opposite side
- Weave the tie through the top stitches of the front and back panels by inserting the hook into a stitch, skipping two stitches, and pulling the tie through
- Secure and adjust the ties for a comfortable fit
Why a Larger Hook for the Ties
- Switching to a 4.0 mm hook creates a softer, more flexible chain. If you used the smaller hook, the ties could feel stiff and dig into the waist.
- When chaining, avoid pulling too tightly. A tight chain will shorten once worn. Make the tie slightly longer than you think you need.
- Weaving through the top stitches allows the garment to adjust without sewing permanent straps. Skipping two stitches between insertions keeps the tie evenly spaced and prevents bunching.
Once woven, adjust the gathers so the top edge distributes evenly across the waist.
Fit and Sizing Guidance
This pattern is naturally adjustable.
To make it smaller:
- Stop increasing earlier on the front and back panels
To make it larger:
- Continue adding increase rows
- Ensure both front and back remain proportional
Because cotton has minimal stretch, comfort depends on accurate coverage rather than negative ease.
Try it on before fastening off completely if possible.
Stitch and Shaping Clarity
Double crochet provides structure with moderate drape.
It works well here because:
- It builds height quickly
- It creates a smooth surface
- It keeps shaping visible and clean
Edge increases form a triangular growth pattern. That is what creates the natural contour from the narrow center outward.
If you see sharp corners instead of a smooth slope, check that you are increasing only once per edge per row.
Beginner Notes
Even if you understand crochet basics, fitted garments require attention.
- Count stitches regularly.
- Watch your turning chains.
- Check symmetry between front and back.
Small differences become noticeable in wearable pieces.
Troubleshooting
Edges curling
- Your tension may be tight. Try relaxing your grip slightly.
Uneven sides
- You may be missing the final stitch on one side.
Too much flare
- You might have added extra increases accidentally.
Insufficient coverage
- Add more increase rows gradually rather than widening the base section.
Finishing Notes
- Weave in all ends securely, especially near the tie attachments.
- Block lightly if needed. With cotton, gentle steam can help the fabric settle and even out stitch tension.
- Take time to adjust the ties evenly before wearing. Balanced gathering improves both comfort and appearance.